Page 1 of 4
Lifting the floor (slightly)
Posted: Sun Dec 29, 2013 3:29 pm
by DaviesDJ
Hi guys, after a little further tweaking of my bowls etc I thought i would post my progress on reworking my current heads for my top end rebuild.
http://i1064.photobucket.com/albums/u36 ... age-15.jpg
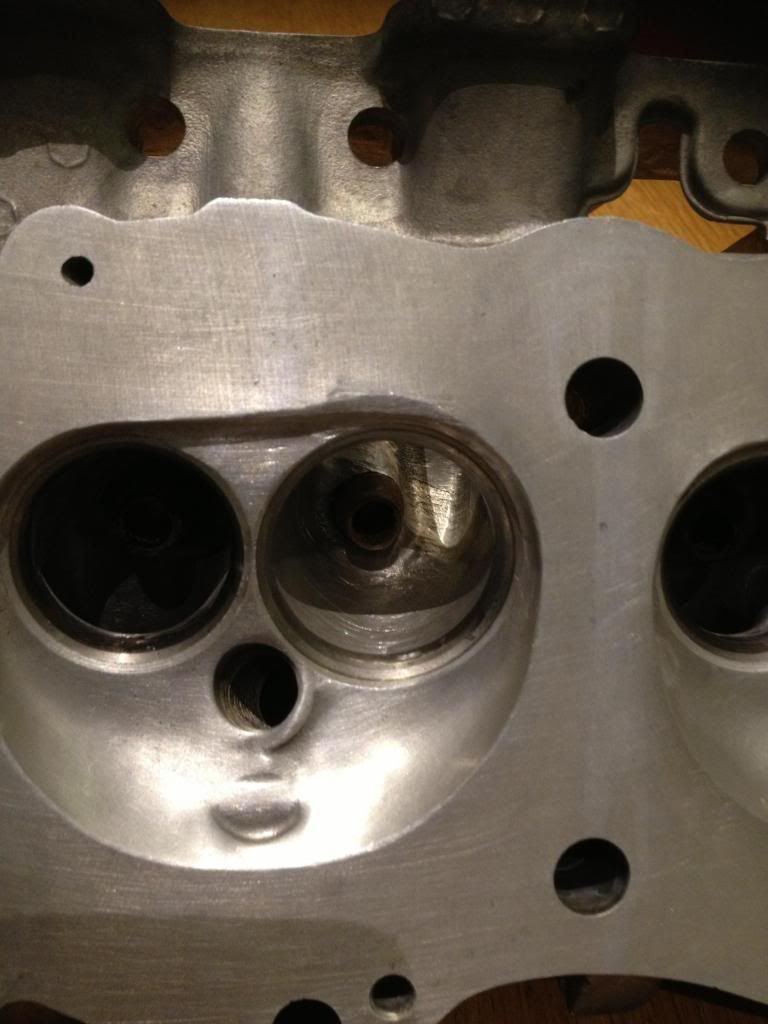
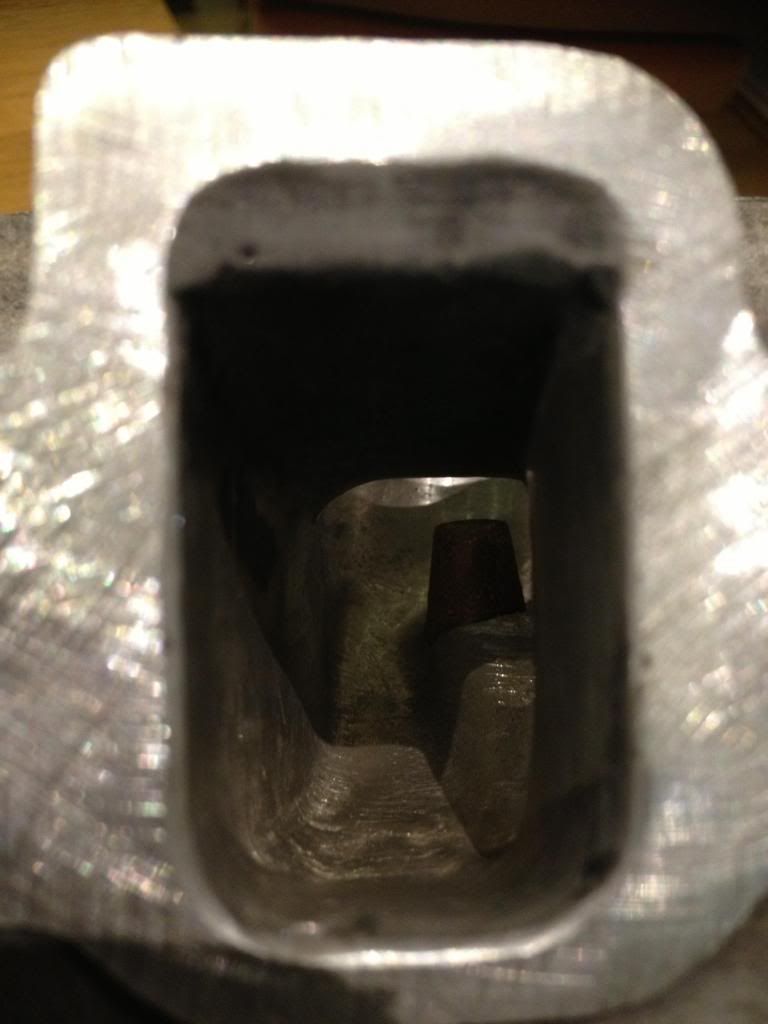
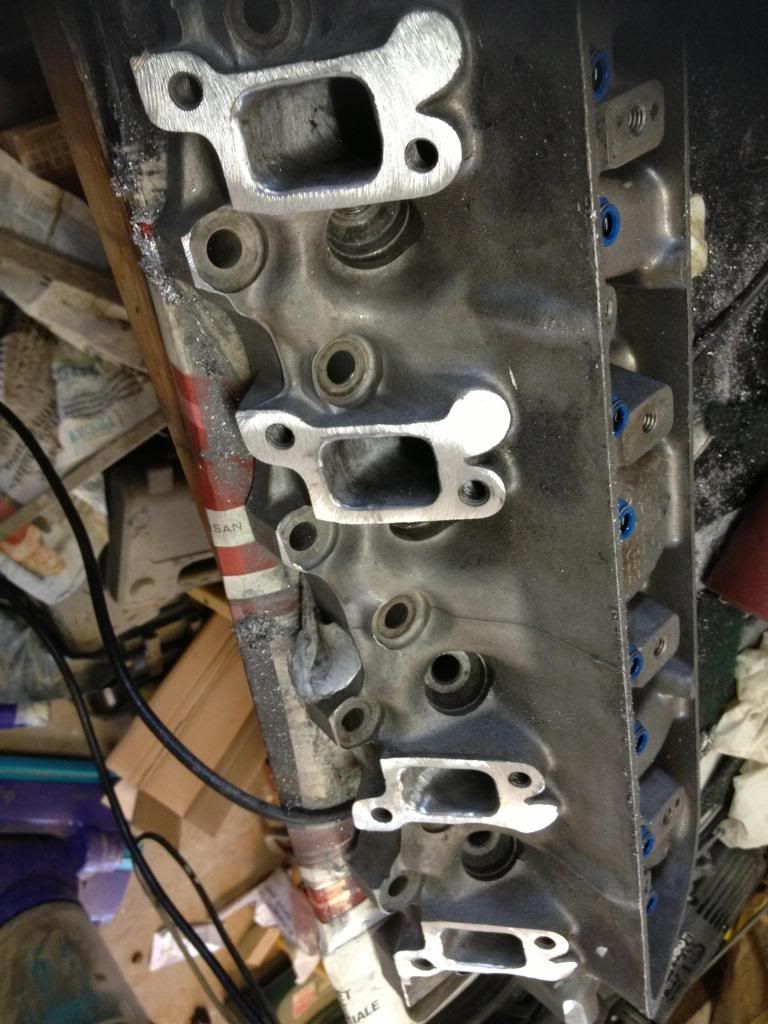
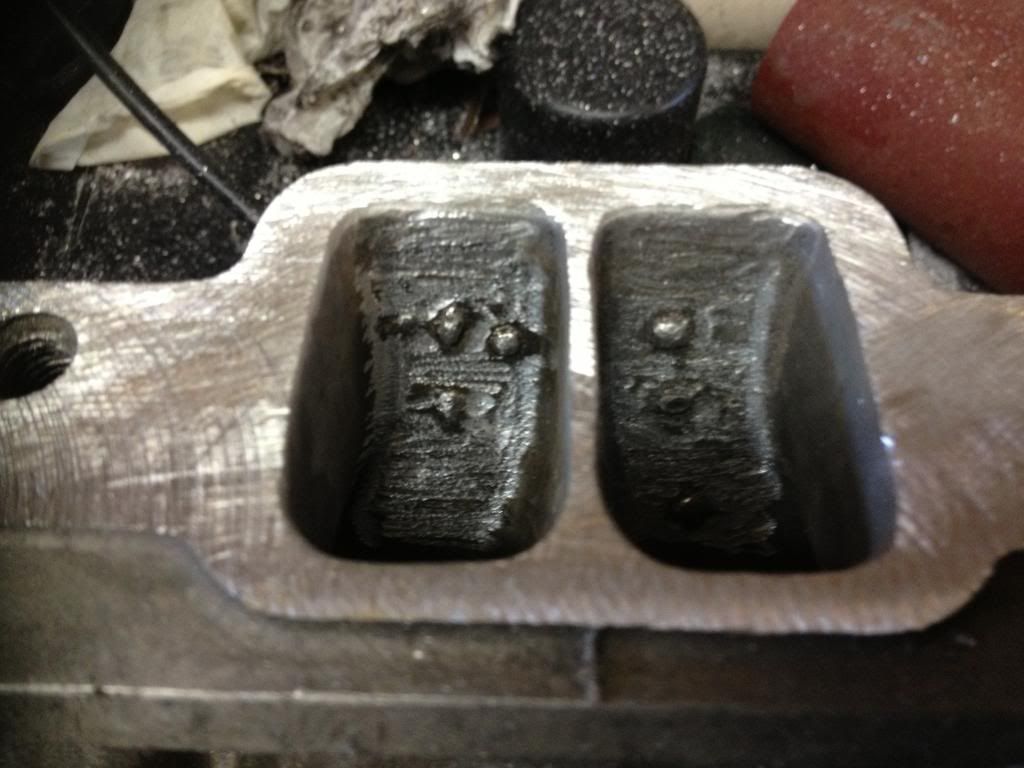
Port roof lifted and exhausts cleaned up (already maximum volume IMHO). Pics of roof lift featrured earlier. Good key put on the inlet floor with a few blobs of anchoring weld.
http://i1064.photobucket.com/albums/u36 ... age-16.jpg
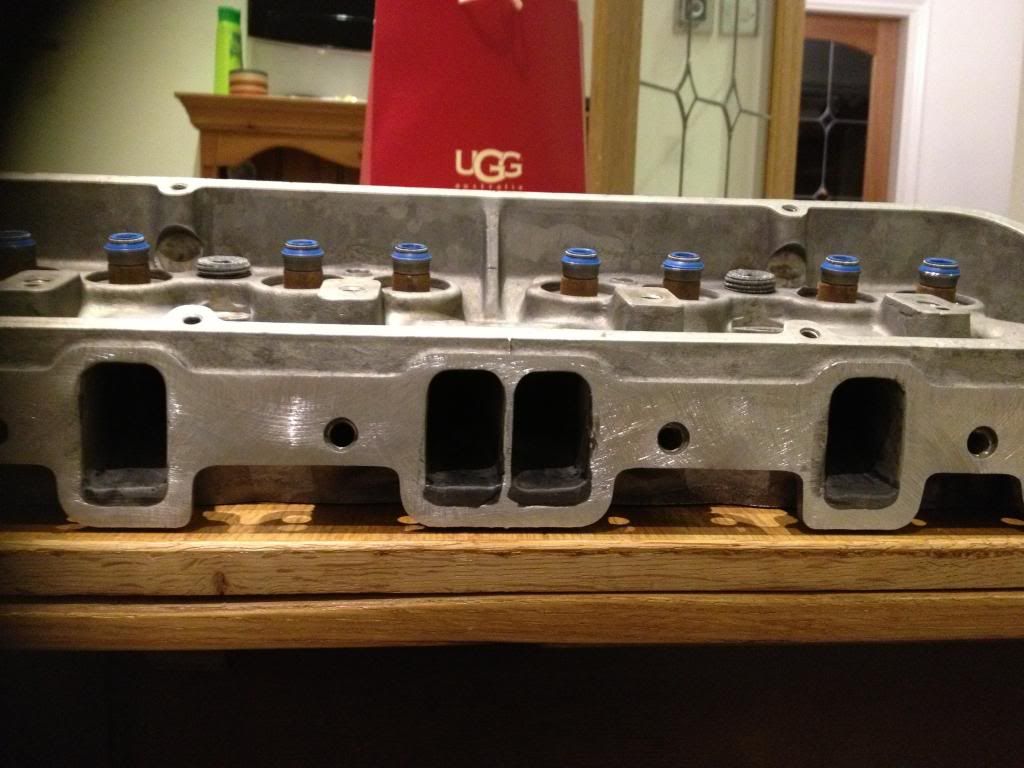
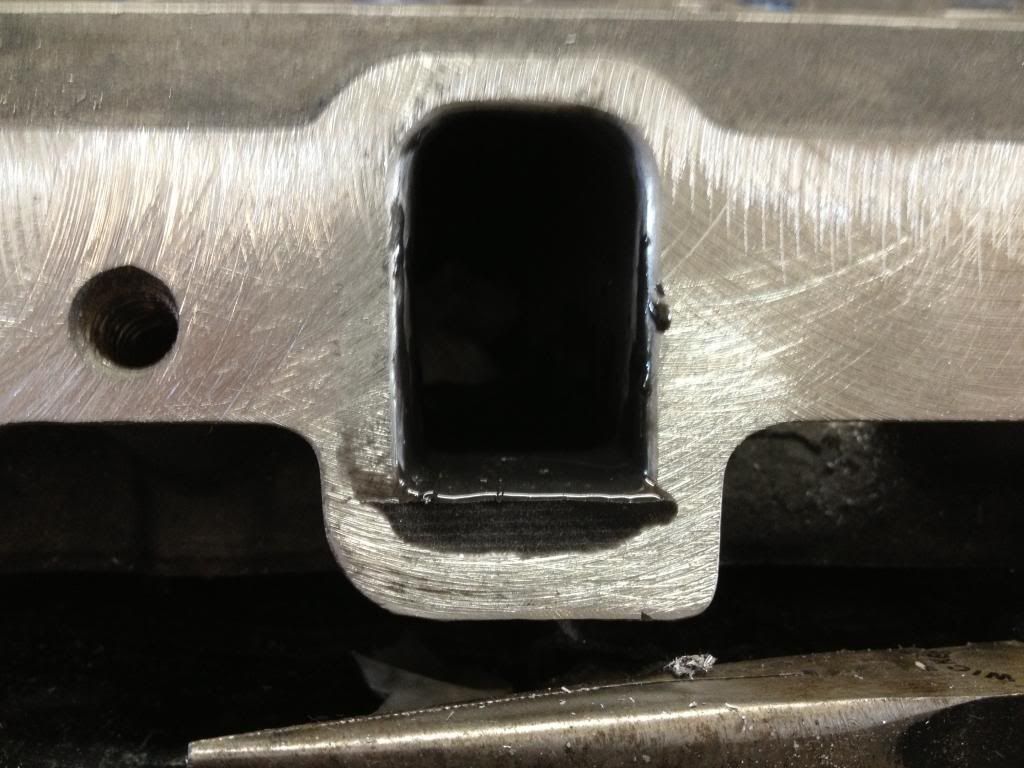
Tape was aimed across the floor of each port - aiming for the same volume as the initially reworked port but higher. The resin fill is equivalent to the lift of the roof.
http://i1064.photobucket.com/albums/u36 ... age-17.jpg
So I want to be careful to maintain the taper inwards closing the CSA towards the valve. Next is to sand excess and blend into the short side turn.
Posted: Sun Dec 29, 2013 6:37 pm
by DaviesDJ
So a little progress
Have been in my special parts washer while my wife was out;-) next to ceramic coat the chambers and valve faces, lap in the valves and then start the next one. Ports are the same volume more or less as I began with. Any thoughts??[/list]
Re: Lifting the floor (slightly)
Posted: Mon Dec 30, 2013 12:05 am
by mgbv8
DaviesDJ wrote:Hi guys, after a little further tweaking of my bowls etc I thought i would post my progress on reworking my current heads for my top end rebuild.
http://i1064.photobucket.com/albums/u36 ... age-15.jpg
Port roof lifted and exhausts cleaned up (already maximum volume IMHO). Pics of roof lift featrured earlier. Good key put on the inlet floor with a few blobs of anchoring weld.
http://i1064.photobucket.com/albums/u36 ... age-16.jpg
Tape was aimed across the floor of each port - aiming for the same volume as the initially reworked port but higher. The resin fill is equivalent to the lift of the roof.
http://i1064.photobucket.com/albums/u36 ... age-17.jpg
So I want to be careful to maintain the taper inwards closing the CSA towards the valve. Next is to sand excess and blend into the short side turn.
All looks quite complicated to me DJ. Whats the idea of the blobs of weld in the runners ?
Pel
Posted: Mon Dec 30, 2013 9:46 am
by DaviesDJ
HI Pel, the blobs of weld are intneded to provide a really good key/grip for the epoxy. i am actuqally quite pleased with how it 'seems' to have turned out. This evening I will ceramic coat the bowls and then polish them, then finally lap in the valves. It will probarbly either make no difference or cause catastrophic problems knowing my luck. But I can t help myself Pel, I am still to green to know when to just keep it simple

Obviously my manifold runners will be matched and this will be easier.
Posted: Mon Dec 30, 2013 9:00 pm
by mgbv8
That makes sense

If you are lapping the valves in then get one of those EEZI lap things from Halfords to go in the battery drill. I got mine a year ago and have been kicking myself ever since over how much time I've wasted lapping valves in over the last 10 years. Once you get the hang of how to use it your life will be a lot easier

Pel
Posted: Mon Dec 30, 2013 9:16 pm
by DaviesDJ
Just a little on the final head prep
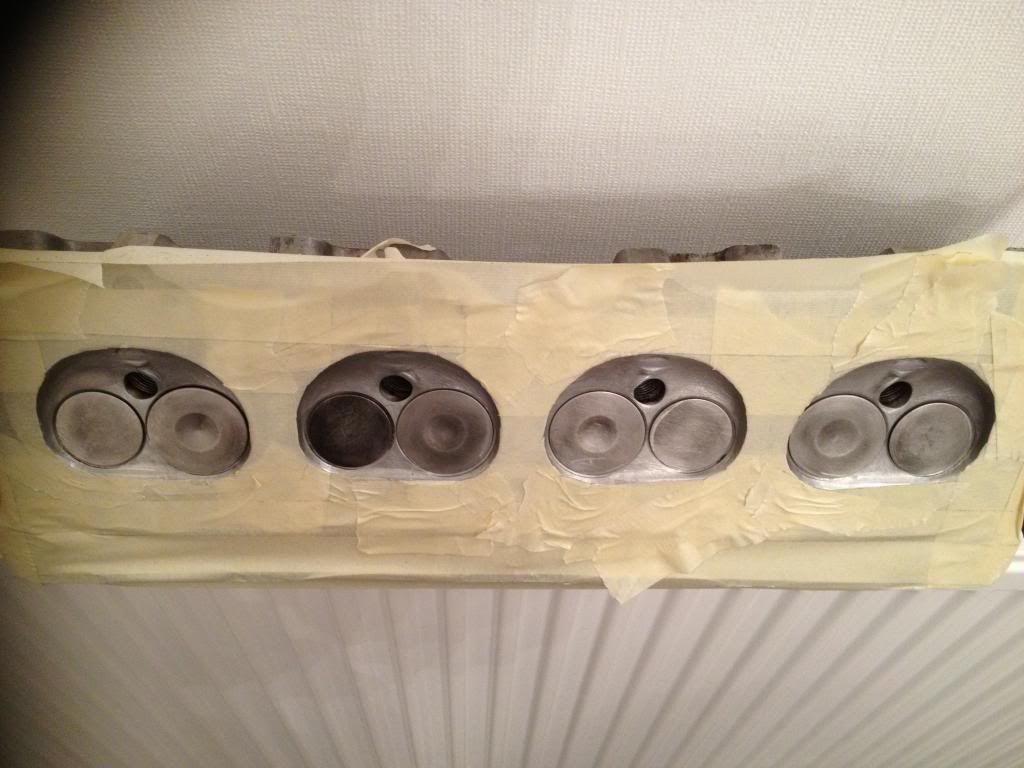
Sprayed
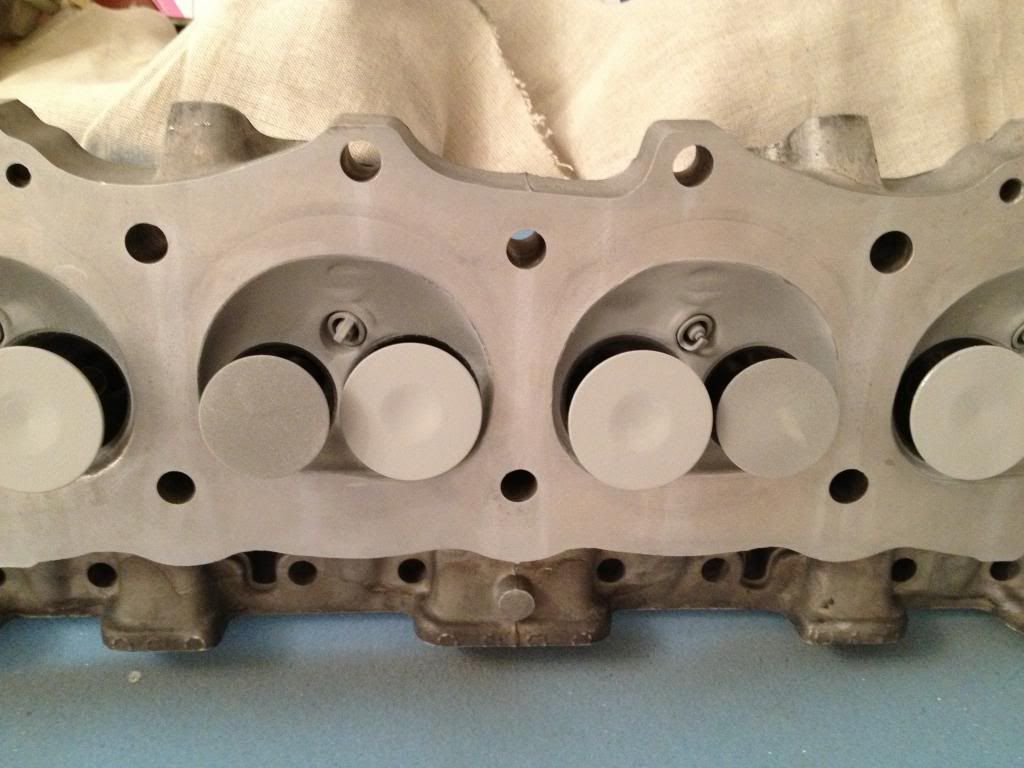
In the oven!
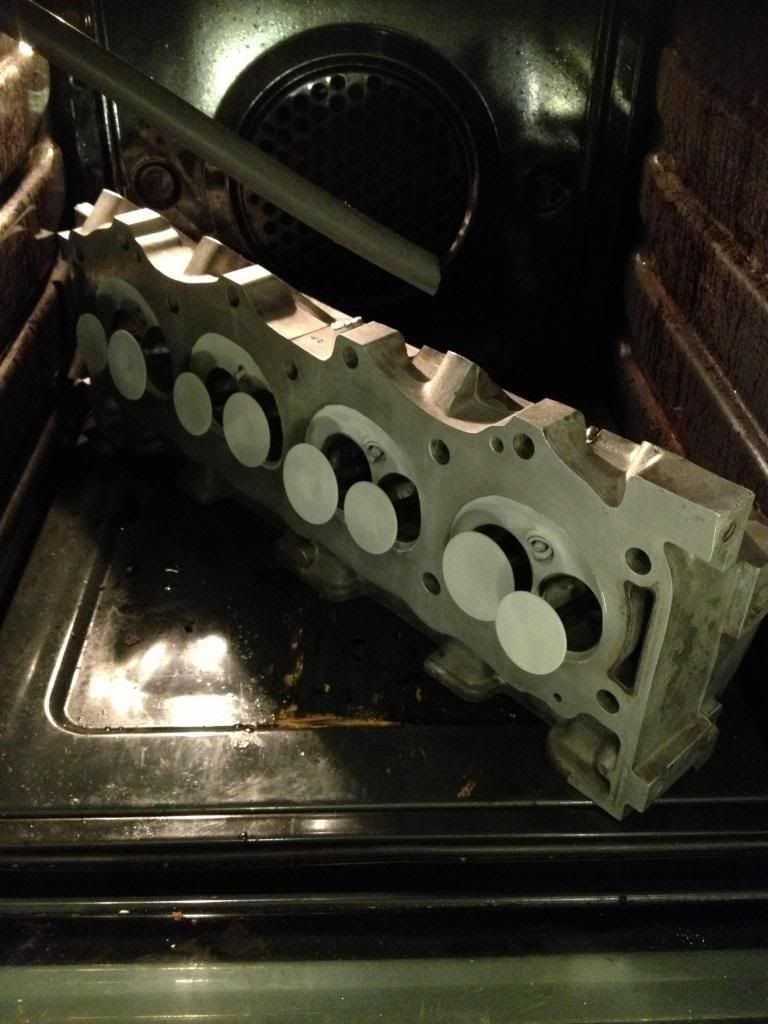
I am sure this is all a complete waste of time!
In terms of cam I am now down to either the Kent 218 or the crower 50232?? Any thoughts??
Posted: Tue Dec 31, 2013 7:35 am
by kiwicar
Hi
this is a 5 liter ish engine? I think you want about 224 to 235 degrees unless this is going in a tow vehicle/the landy.
best regards
Mike
Posted: Tue Dec 31, 2013 9:02 am
by ChrisJC
mgbv8 wrote:That makes sense
If you are lapping the valves in then get one of those EEZI lap things from Halfords to go in the battery drill. I got mine a year ago and have been kicking myself ever since over how much time I've wasted lapping valves in over the last 10 years. Once you get the hang of how to use it your life will be a lot easier
Pel
I just use a cordless drill on the valve stem.
Chris.
Posted: Tue Dec 31, 2013 5:27 pm
by mgbv8
ChrisJC wrote:mgbv8 wrote:That makes sense
If you are lapping the valves in then get one of those EEZI lap things from Halfords to go in the battery drill. I got mine a year ago and have been kicking myself ever since over how much time I've wasted lapping valves in over the last 10 years. Once you get the hang of how to use it your life will be a lot easier
Pel
I just use a cordless drill on the valve stem.
Chris.
Thats what Ive done for years Chris, and it works ok as long as you dont get to physical with the chuck. But this thing is great as it oscillates and you control how slow or quick the valve rotates in the seat. Next time you are doing some valves I'll lend you mine to play with mate. I'll be surprised if you are not impressed with it
Happy New year!
Pel
Posted: Tue Dec 31, 2013 8:48 pm
by DaviesDJ
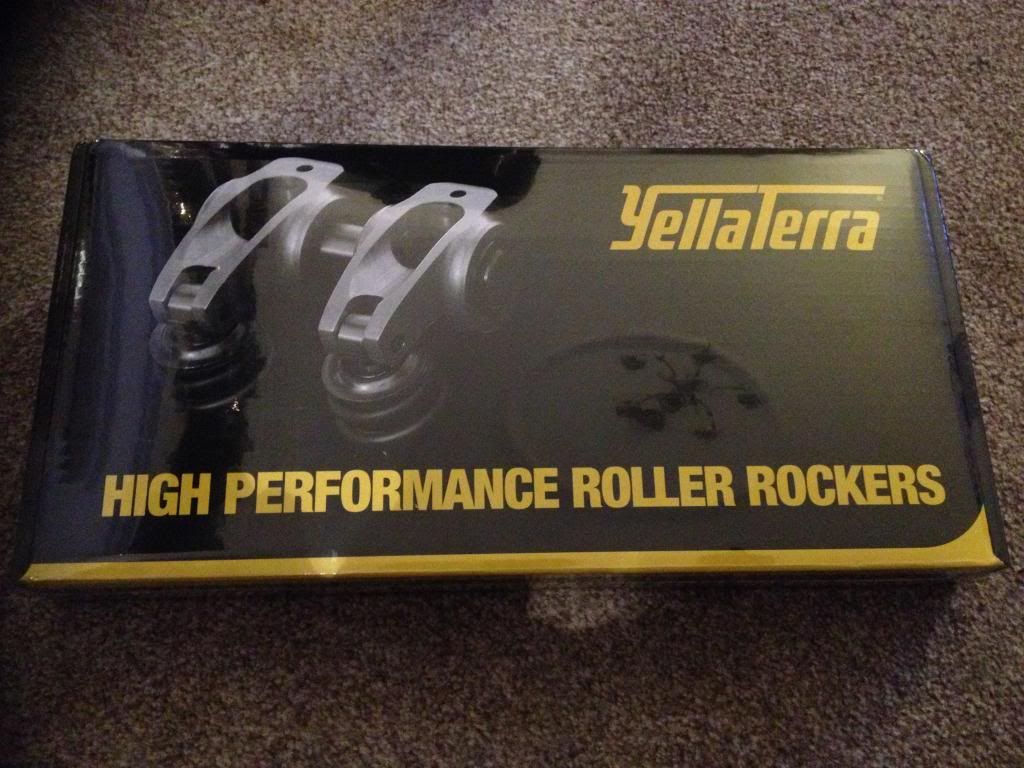
Started re-assembling. Roller rockers arrived today! My god they are to gorgeous to use! The yella terras certainly look the part! Will post a pick. Wonder what BHP all this nonsense will land me?? And what ET at the 1/4 mile???
Posted: Wed Jan 01, 2014 11:08 am
by Blown v8
We need more pics

Posted: Wed Jan 01, 2014 11:24 am
by minorv8
How does the epoxy stay in place if you think about long term ? I know that they are commonly used in e.g. Engine Masters competition but how about real life engines ?
Posted: Wed Jan 01, 2014 1:37 pm
by kiwicar
Hi
in my experience the stuff stands up pretty well, if it is exposed directly to flame it degrades to a powder but on the short turn side of an exhaust port it should be fine. It would be no good in the exhaust manifold
best regards
Mike
Posted: Wed Jan 01, 2014 2:04 pm
by DaviesDJ
The epoxy is on the inlet port floor, and shoul hold- it has weld in the floor to make a really good key! The roller rockers came in this box. I will post a pic of the rockers themselves later!
I am going to buy some new rocker shafts to mount them on. Do you guys think it is worth going for the cheap pattern ones?? Or OEM, oil ways and surface are my concern. Have decided on the real steel typhoon cam- the combo of lift and LCA I think are good, although the crower has more lift I measured my valves in situ and from the bottom of the retainer/collet is 0.49 inches above the top of the neoprene seal, with the 885 tvr can I was ok but I am not sure how much lift this has (anybody know???) but things were ok with this. Is it advisable that lift pushes down on the neoprene seal at all? As there is a bit more lift if you factor that in but I am not sure.
I would love to flow these heads on a proper bench to spec the cam but darkspeed (who offered kindly) cannot help for a good few weeks and I want this ready in 2-3 weeks. With the Eddie performer and 5.0 tvr bottom end (not ideal I admit!) I am hoping for north of 300 HP without gas.
Posted: Wed Jan 01, 2014 4:45 pm
by kiwicar
Hi
you should have a minimum of 60 thou clearance between valve seal and spring cap/retainer, 60 thou between each spring coil and the next nothing should be "pushing down" on anything else

best regards
Mike