Page 11 of 14
Posted: Sun Oct 23, 2016 10:04 pm
by Mark
Inside was easier because there were less fiddly buts to figure out.
Got some roughing out done on the outside, but the CNC machining centre got the hump at 100,000 lines of code and gave up !
Going to try it again without line numbers and see if it works

Posted: Mon Oct 24, 2016 8:29 am
by stevieturbo
100,000 ???
How long does that take !! lol
Posted: Sun Feb 05, 2017 1:04 pm
by DEVONMAN
I'm interested to know how the project is going. I installed a jag diff on my son's v8 sierra but not as tidy as yours. What are your plans for the half shafts? We made up adapters to match cossie shafts to the jag drive flanges. We used a cossie shortest shaft on one side and had a splined shaft made the correct length for the other.
Looking forward to more info about your project.
Posted: Thu Feb 16, 2017 11:43 pm
by Mark
Oops, time for an update

I had a serious problem that caused much distress

I'm still not sure if it was a post processor problem or a problem with the machining centre, but I poop my pants and the cutter got smashed to bits...
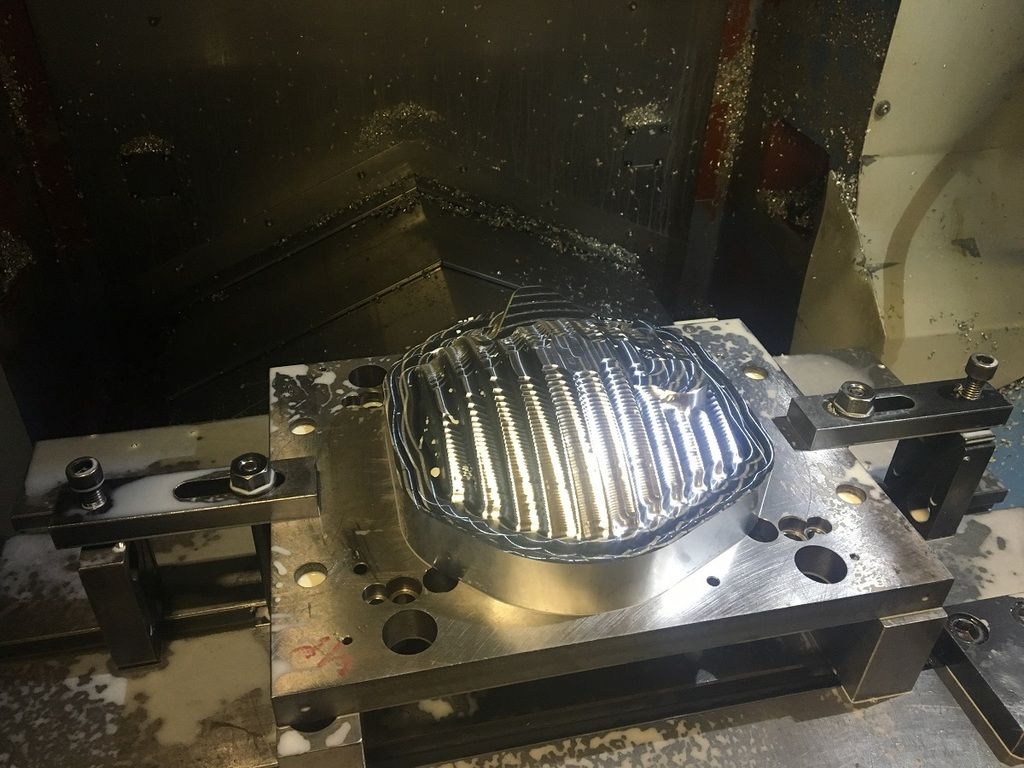
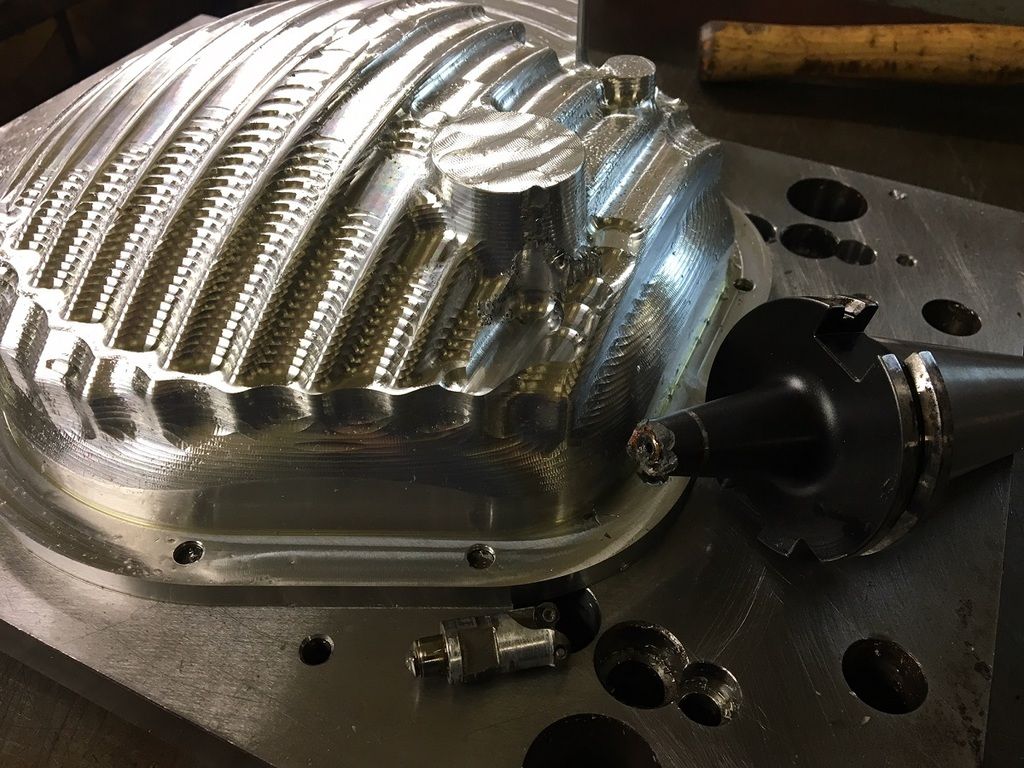
Plan B was a spot of weld to hide the damage, no more fins and a revised design machined on the small CNC at work instead - much slower, but up to this point it has not gone nuts

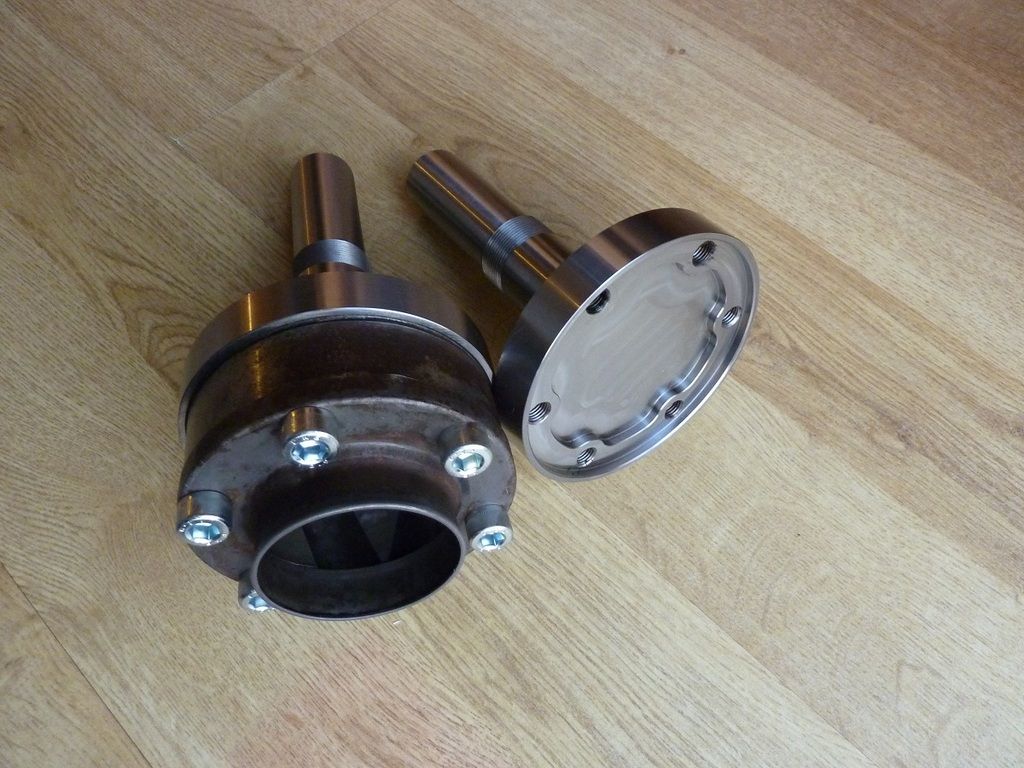
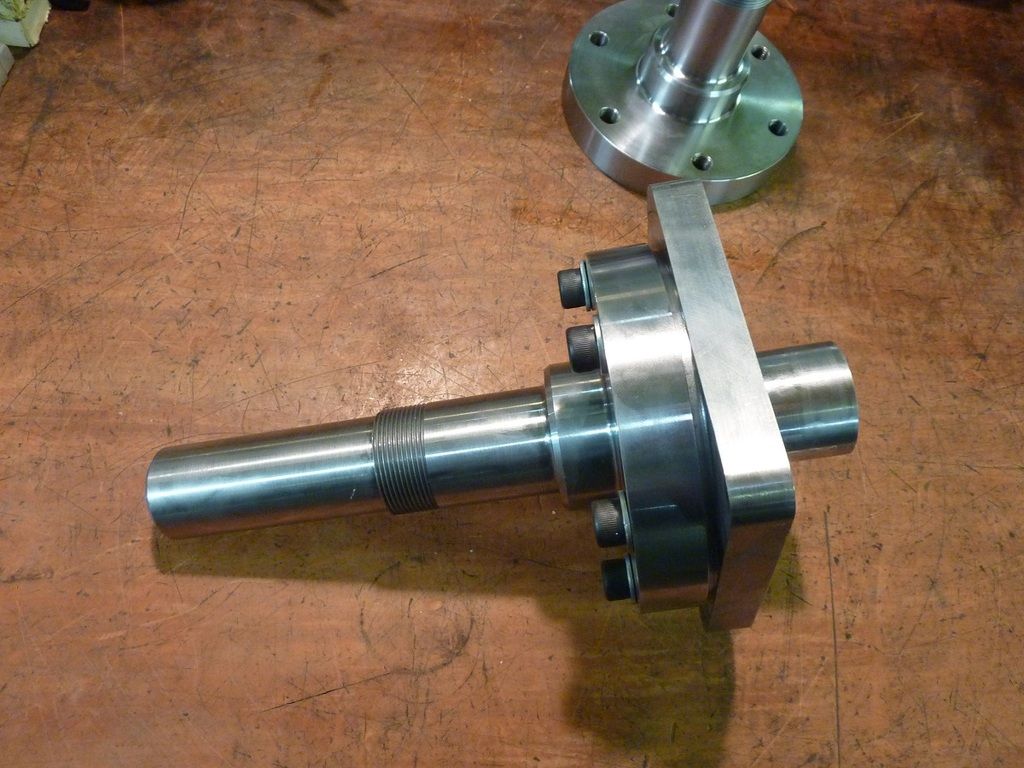
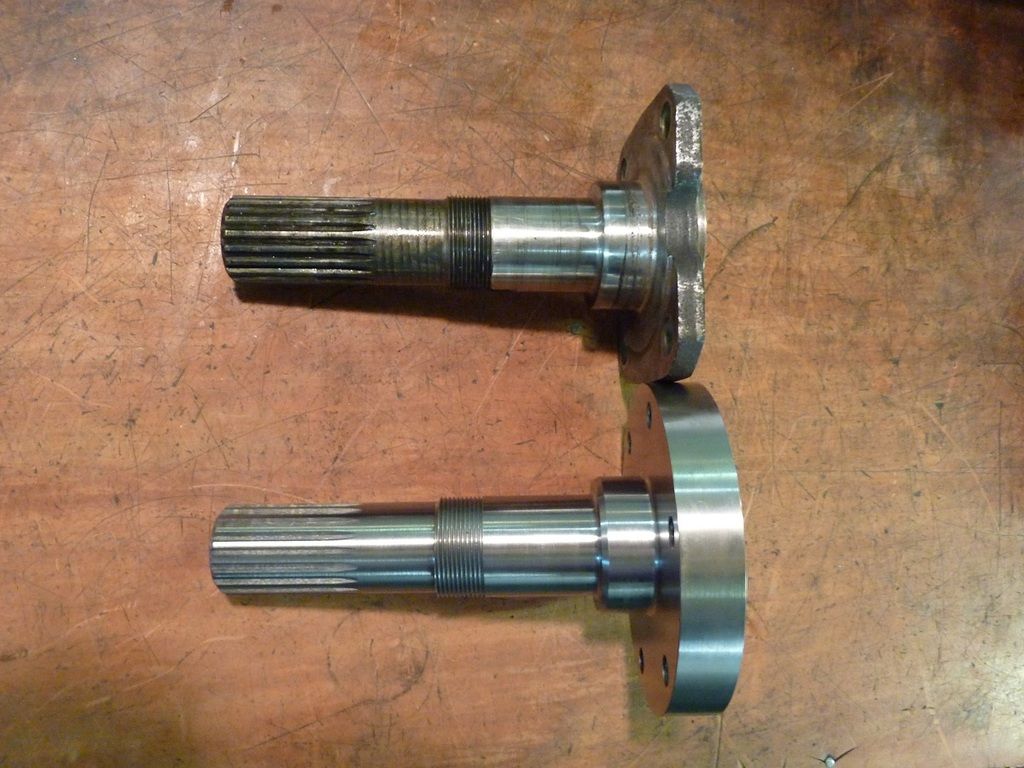
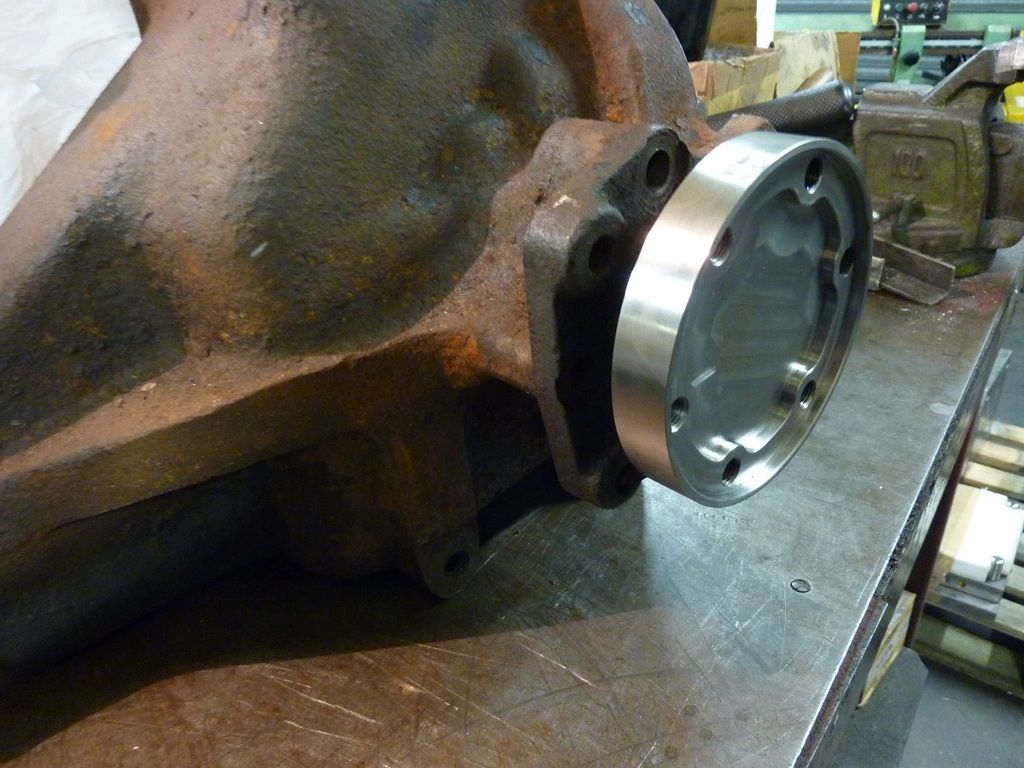
Drive shafts I have a plan for, stock Jag diff output shaft / stub axle
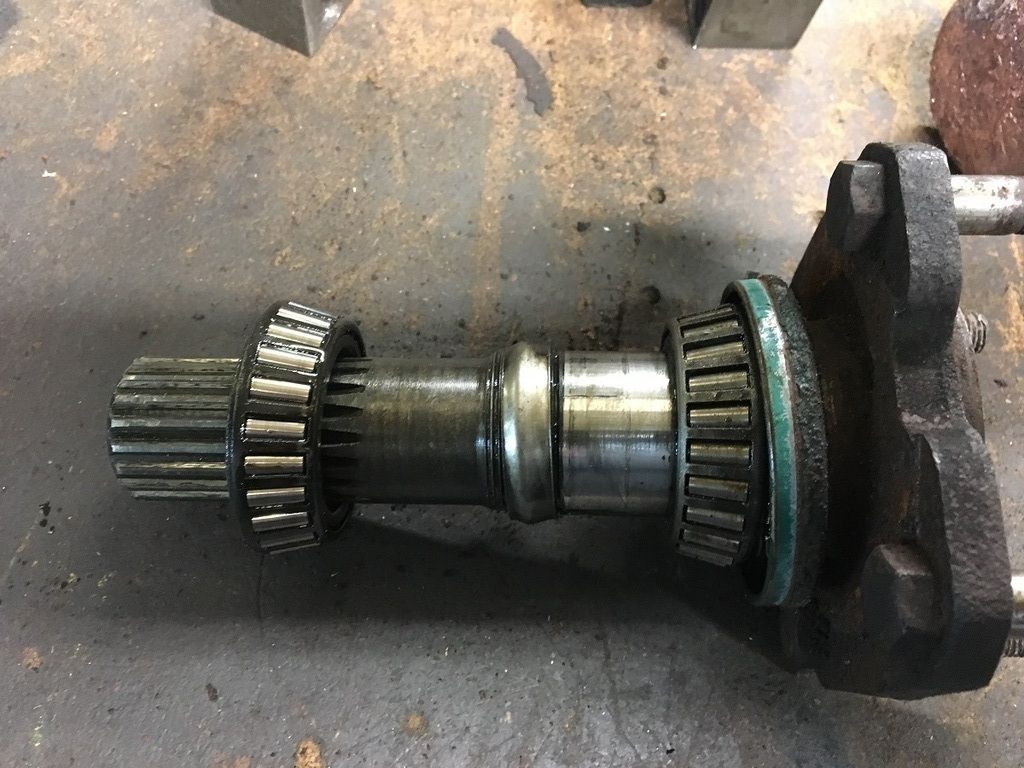
Some high tensile steel
Cunning plan for hybrid Cosworth / Jag set up.
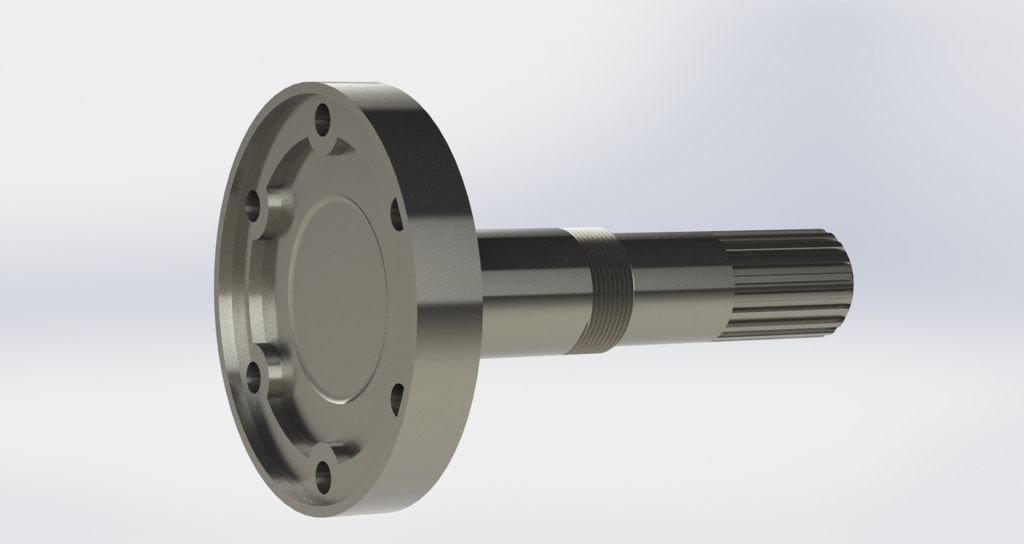
The theory being I can just use standard Cosworth shafts - the Jag diff is a bit wider though which is a cause for concern.
A guy over on Passion ford assured me it will not be a problem as he did similar with a welded setup as pictured below using Jag and Cosworth bits.


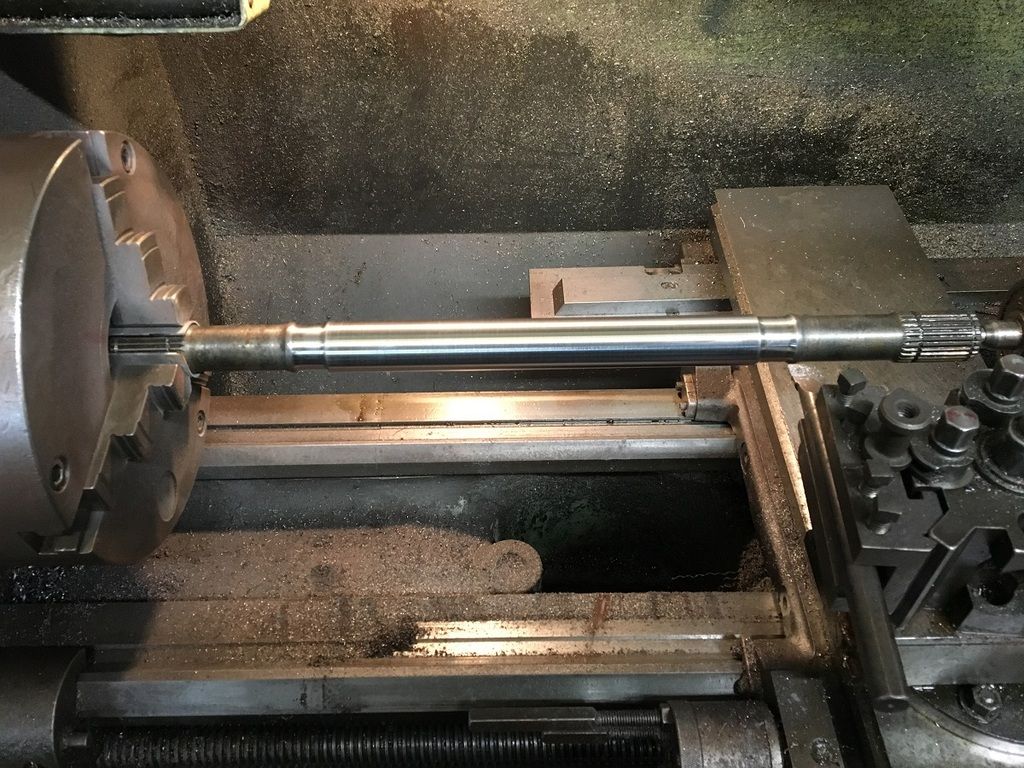
I could have done the turning at work, but our lathe is knackered and I know a nice chap who works a CNC lathe...
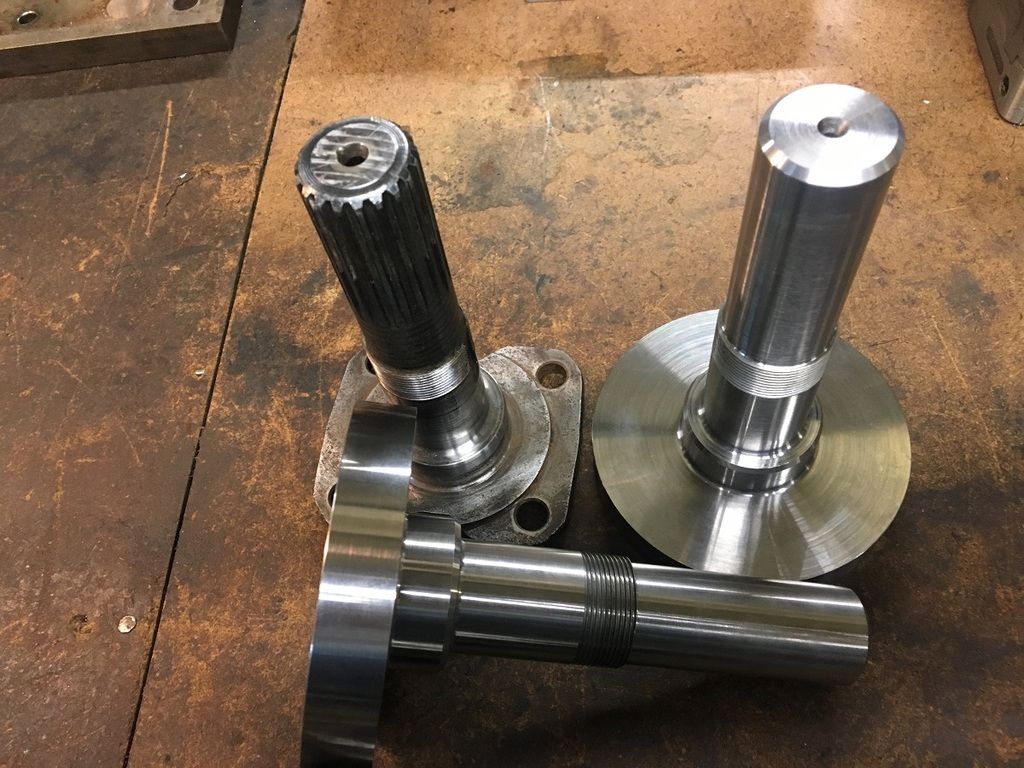
I had to get a spline cutter specially made - it's an involute form and I have no idea how to work that poop out !
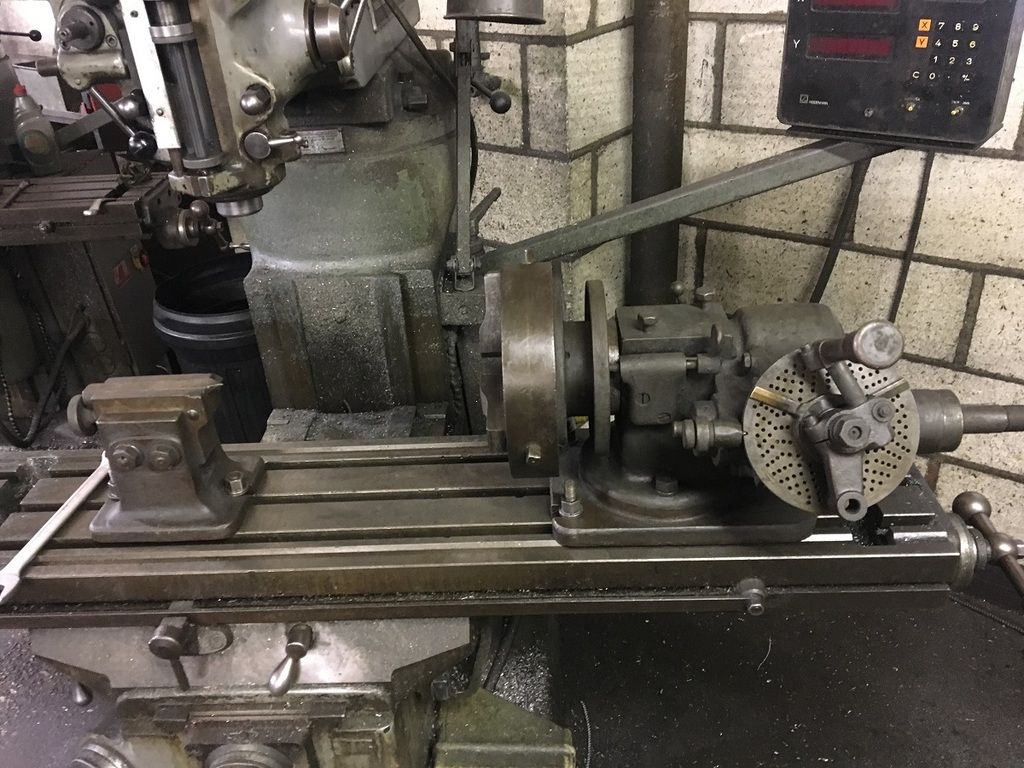
Plan was to cut the splines using our small dividing head, but the flange on the new stub axle is too big to fit - so I dug out the bigger dividing head that has been stat behind a surface grinder for a minimum of 20 years
After endless cleaning and blowing with the airline it was bolted to milling machine.
Now this would have been a great plan if I had bothered to check the hole circle on the big dividing head, it does not have the right amount of holes to give 19 splines / divisions.
Damn thing is now back behind the grinder and I'm making an adaptor to fit between the small dividing head and the new stub axle - watch this space !
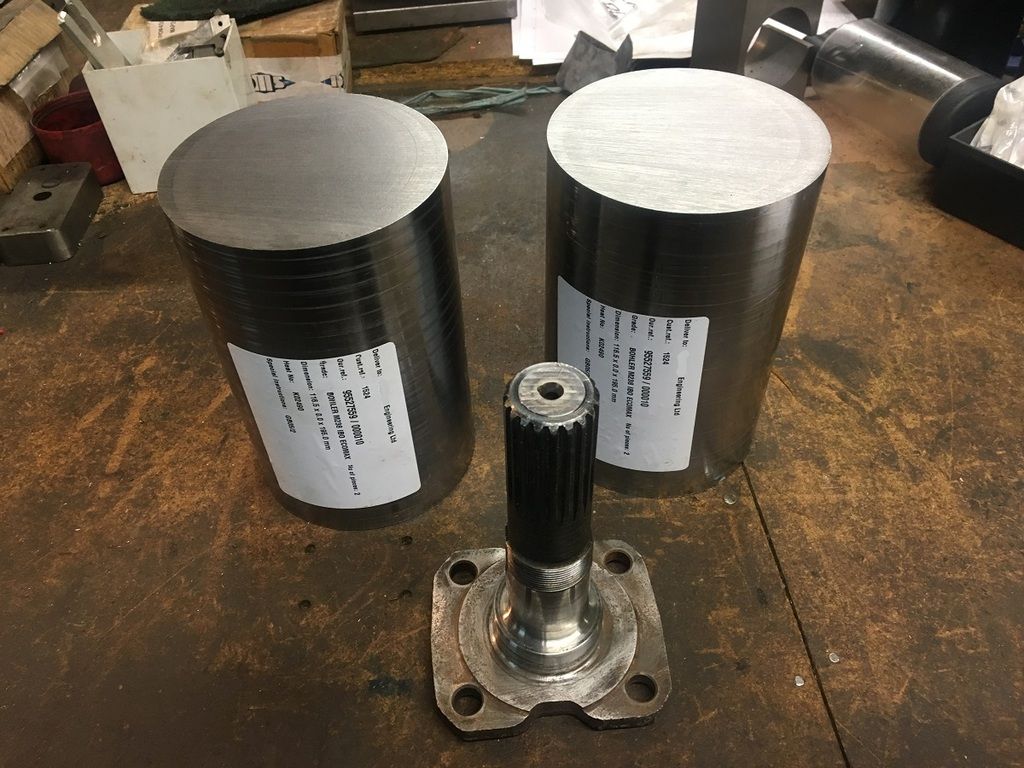
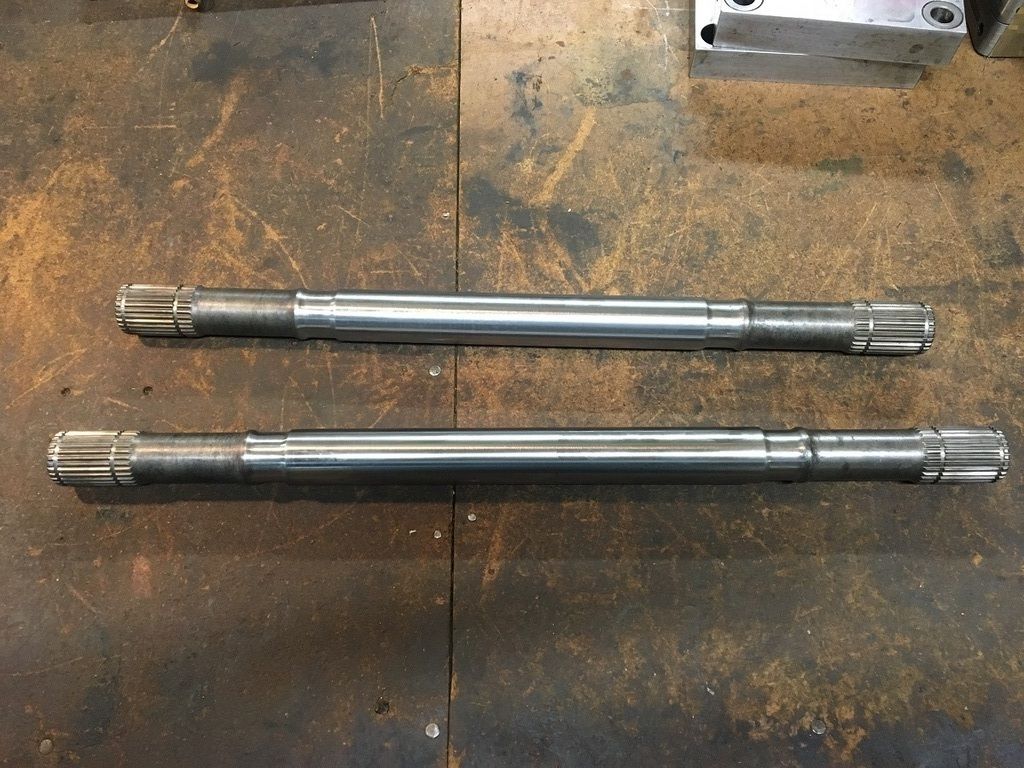
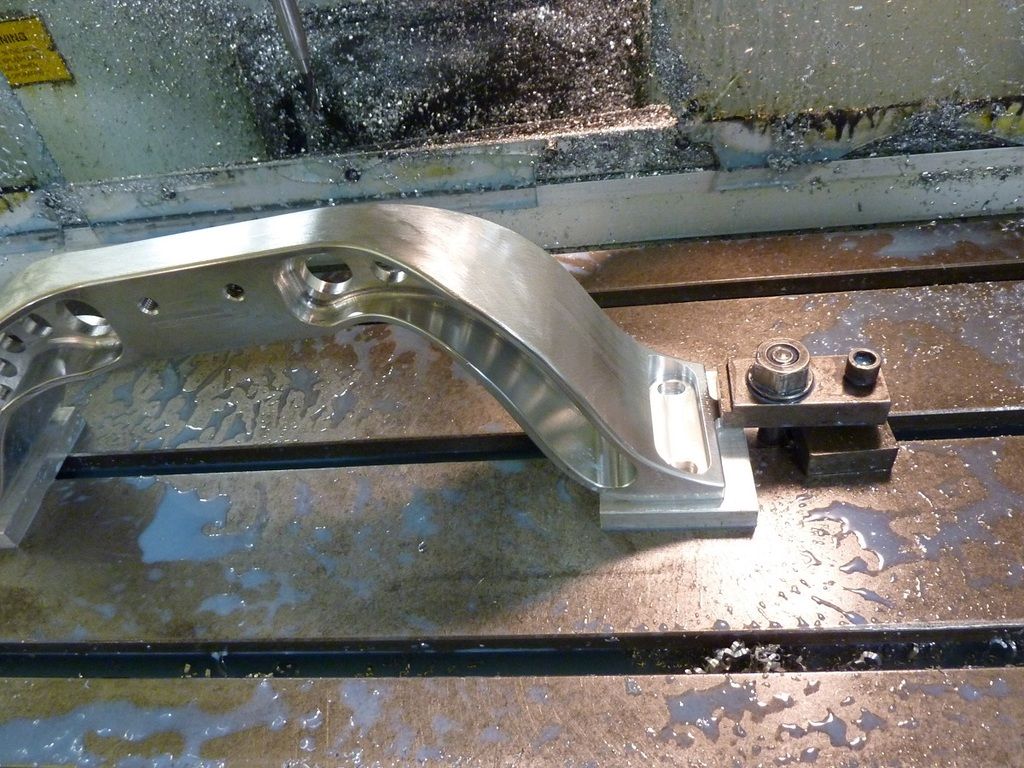
Machining mounting for Cosworth 108mm shafts
That's it until I've been back into work over weekend ...
Drive shafts skimmed on the lathe to clean up
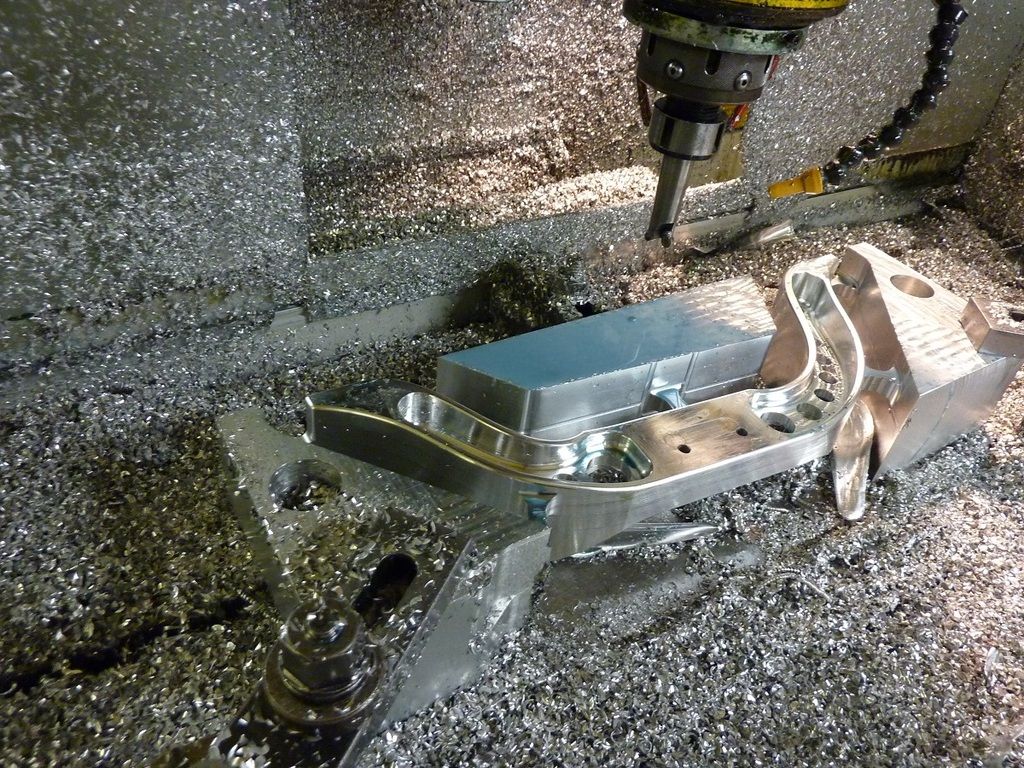
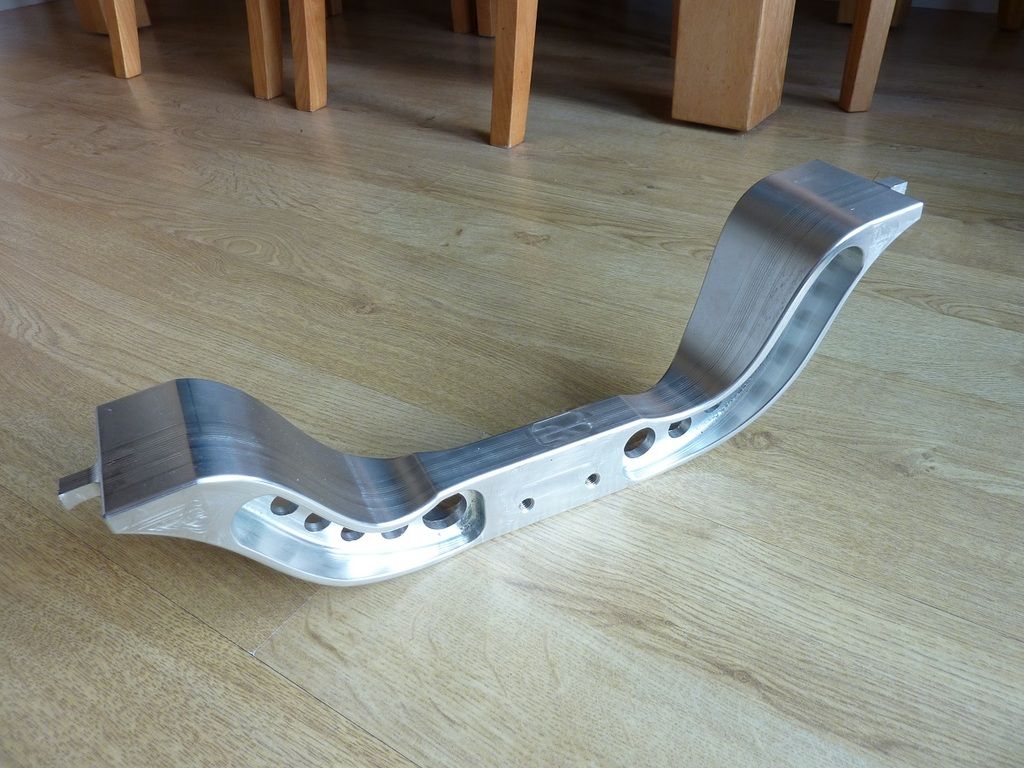
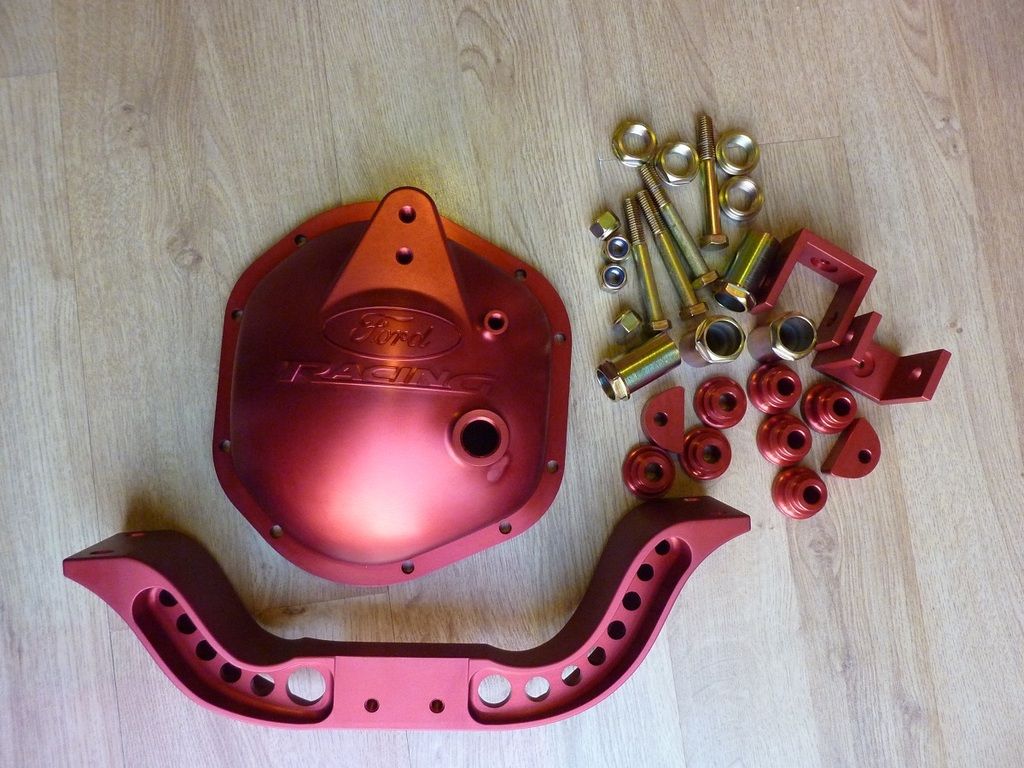
I never liked the gearbox cross member I fabricated, so went into work over Christmas and played - my daily driver not enjoying the cold !
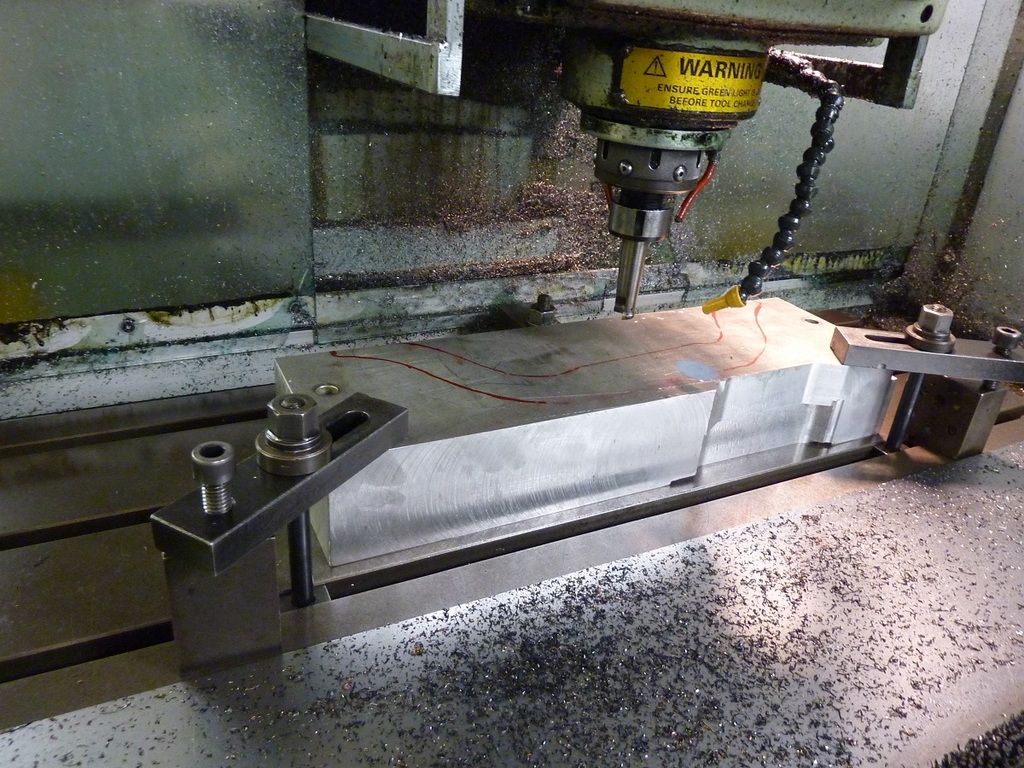
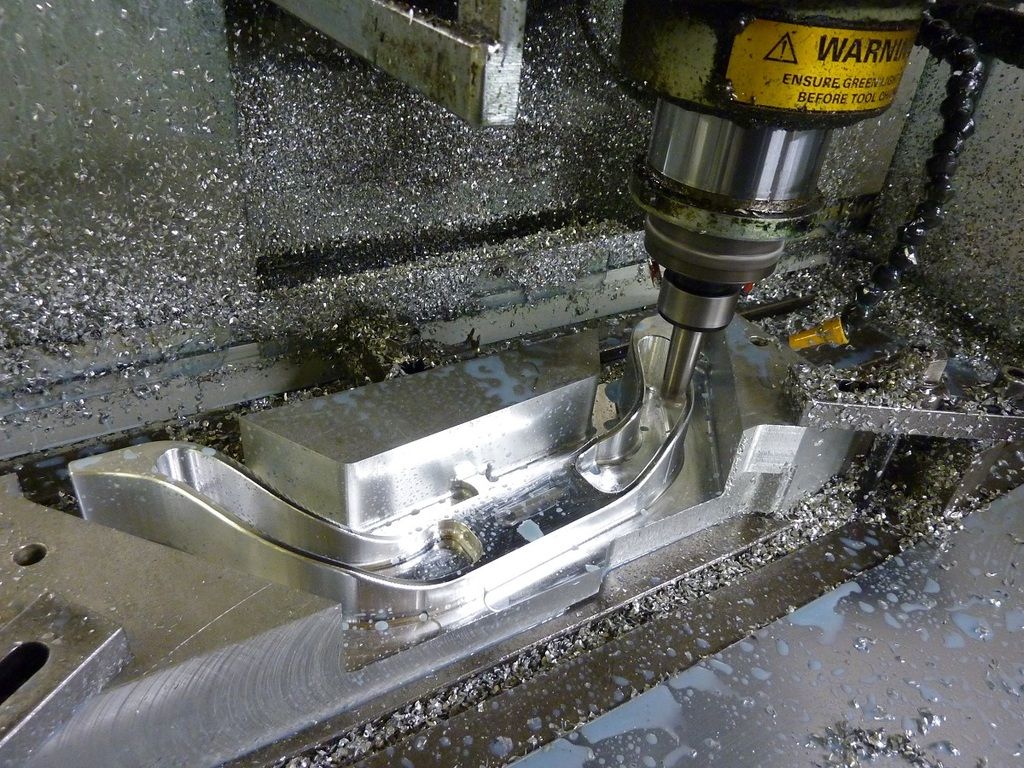
Flipped to do other side


 https://www.youtube.com/watch?v=n5CimGv87cE
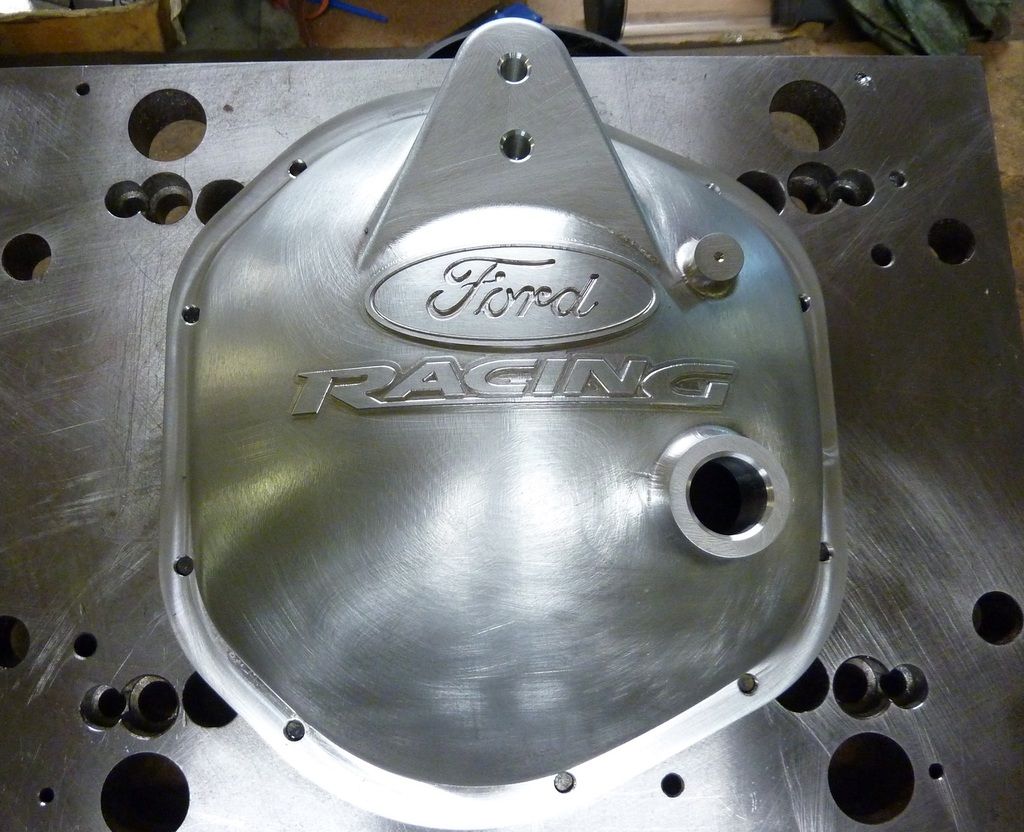
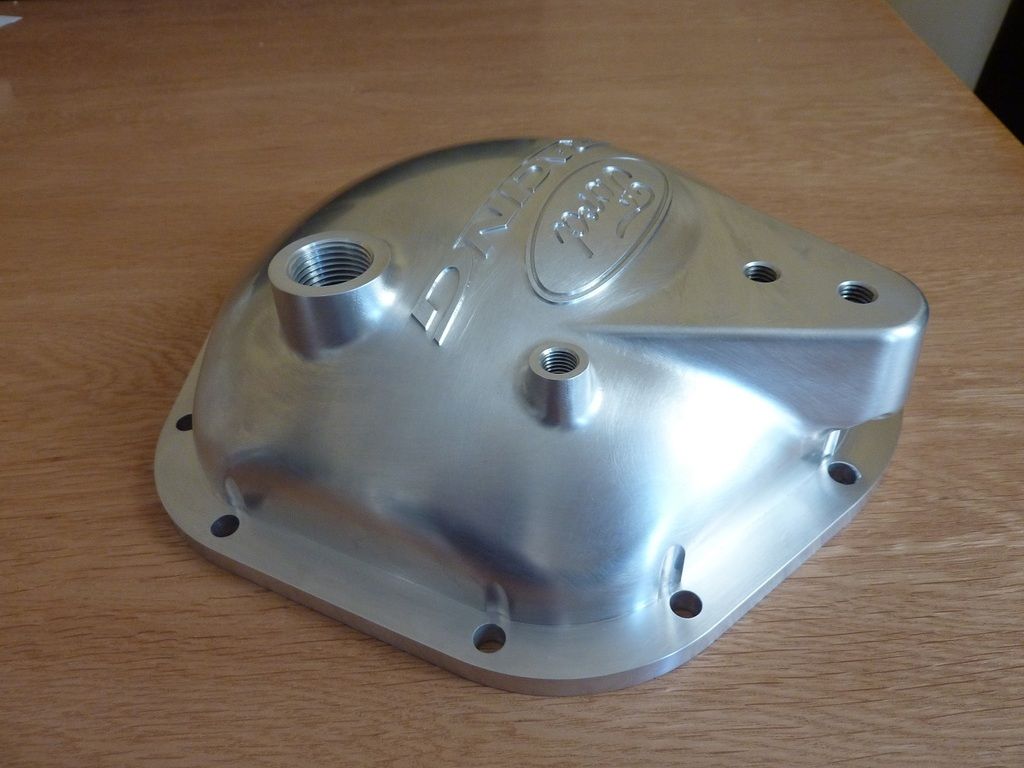
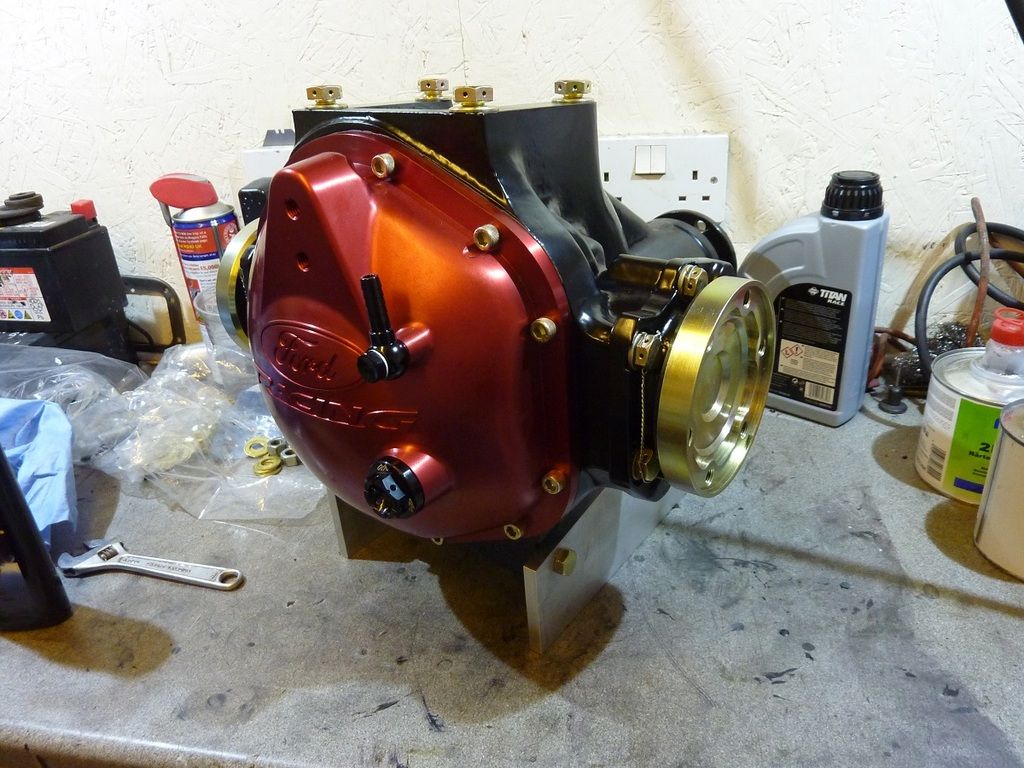
Bits back from anodising, bloody weld shows on diff cover though
That's it for now
Posted: Fri Feb 17, 2017 9:45 am
by DEVONMAN
Brilliant work ! Oh! I wish I had a machine shop.
Posted: Fri Feb 17, 2017 9:47 am
by Eliot
So when making spline shafts - you just need HT steel? It doesn't need hardening or anything afterwards?
Posted: Fri Feb 17, 2017 1:27 pm
by Mark
The jag bits are induction hardened on the splines, but the metal files very easily.
I think / hope it was done just to toughen up the casting !
I quizzed the technical guy at Bohler the supplier of my steel and this grade is used a lot in motorsport as it's pre-toughened with 150,000 psi tensile strength.
Don't want to risk any distortion with further heat treatments and with luck it will be ok !
The guys at work think I'm mental going in at weekends to do this stuff, but I like making things.
Posted: Fri Feb 17, 2017 2:47 pm
by Eliot
My old man used to do all his "homers" during the day, he worked at ERA in dunstable - the foreman was always trying to catch him at it.
He was welding a cylinder head up once and noticed footsteps coming round the bottom of the wall - so without stopping he swapped the cylinder head for something more official looking - foreman asks him to stop welding and show him what he's doing and of course he produced stuff he was supposed to be doing and the head was hidden away under the bench.
Posted: Fri Feb 17, 2017 8:17 pm
by JSF55
I'm amazed at all the stuff your producing, it's a great piece of art !!
Posted: Fri Feb 17, 2017 11:46 pm
by stevieturbo
Superb work !
When welding alloy to be anodised, you need to use particular filler rods otherwise the anodising will change colour !
It might have been better in this case to use filler made from the actual shavings or metal removed from the billet.
If it's a big deal, you could have the anodising removed, grind out the weld and re-do it all though.
I think caustic soda can be used to remove the anodising.
Posted: Sat Feb 18, 2017 9:12 am
by Mark
stevieturbo wrote:Superb work !
When welding alloy to be anodised, you need to use particular filler rods otherwise the anodising will change colour !
It might have been better in this case to use filler made from the actual shavings or metal removed from the billet.
If it's a big deal, you could have the anodising removed, grind out the weld and re-do it all though.
I think caustic soda can be used to remove the anodising.
I think it will just get left or have an oil fill sticker to hide it up
Posted: Sat Feb 18, 2017 7:43 pm
by Mark
Another Saturday at work...
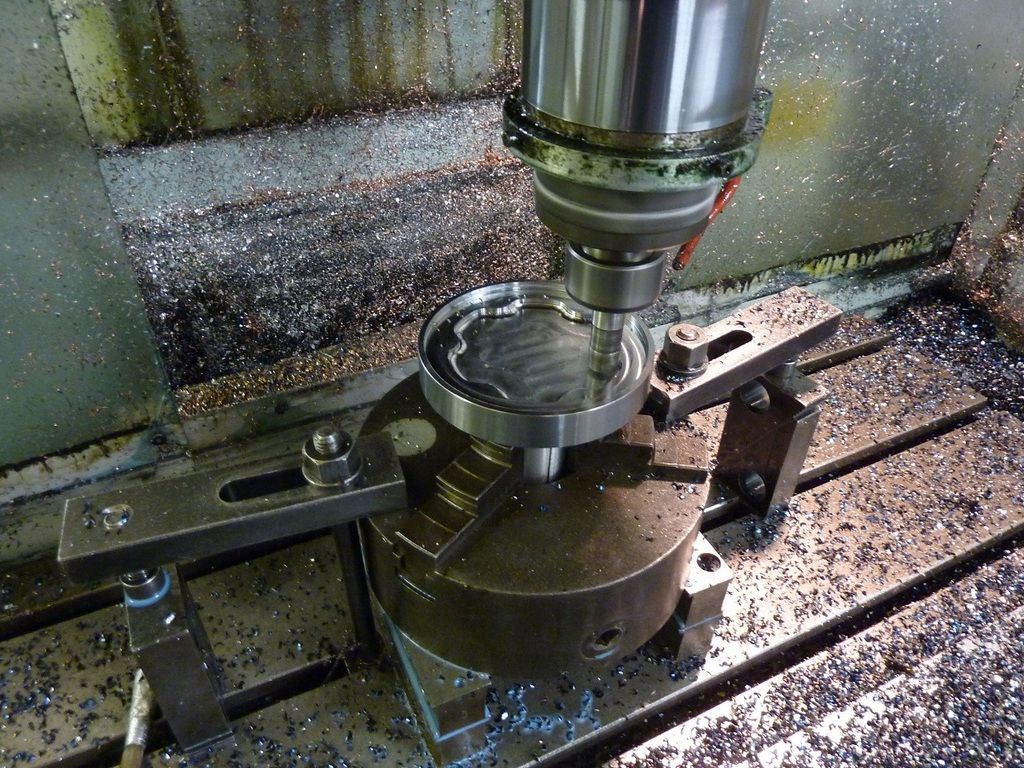
Stub axle bolted to adaptor so it fits in dividing head
Form cutter for splines I had to get specially made
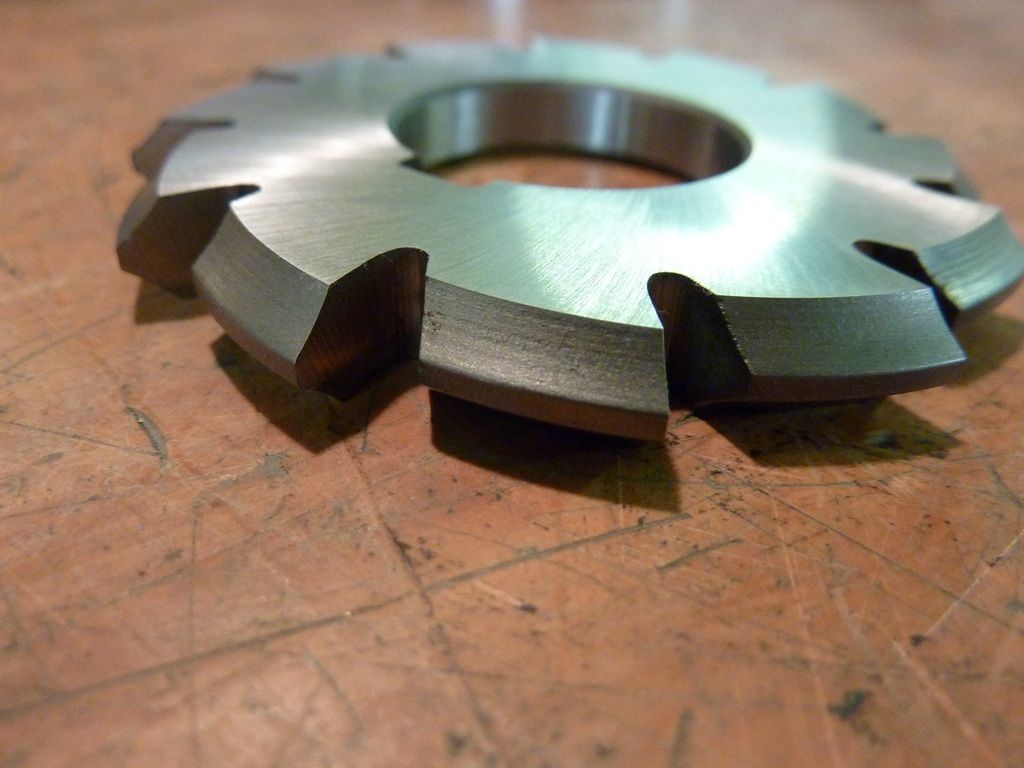
This bit took many hours to do the pair and get the size spot on
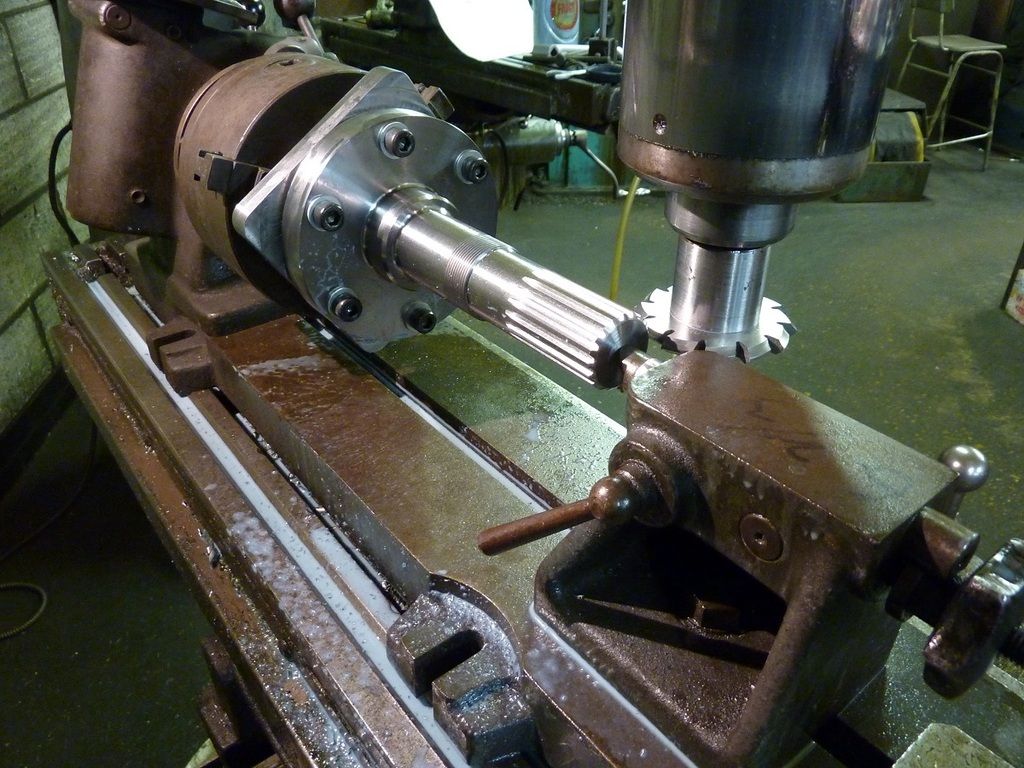
All done apart from slot for locking tab.

I had enough at this point and buggered off home, the slots can wait for another day
Posted: Fri Sep 08, 2017 7:01 pm
by Mark
Just testing to see if picture are working ?
Posted: Sat Sep 09, 2017 12:35 am
by unstable load
That is plain HOT!!
Posted: Sat Sep 09, 2017 9:03 pm
by Mark
unstable load wrote:That is plain HOT!!
Thanks mate.
If the pictures are working here's a few more.
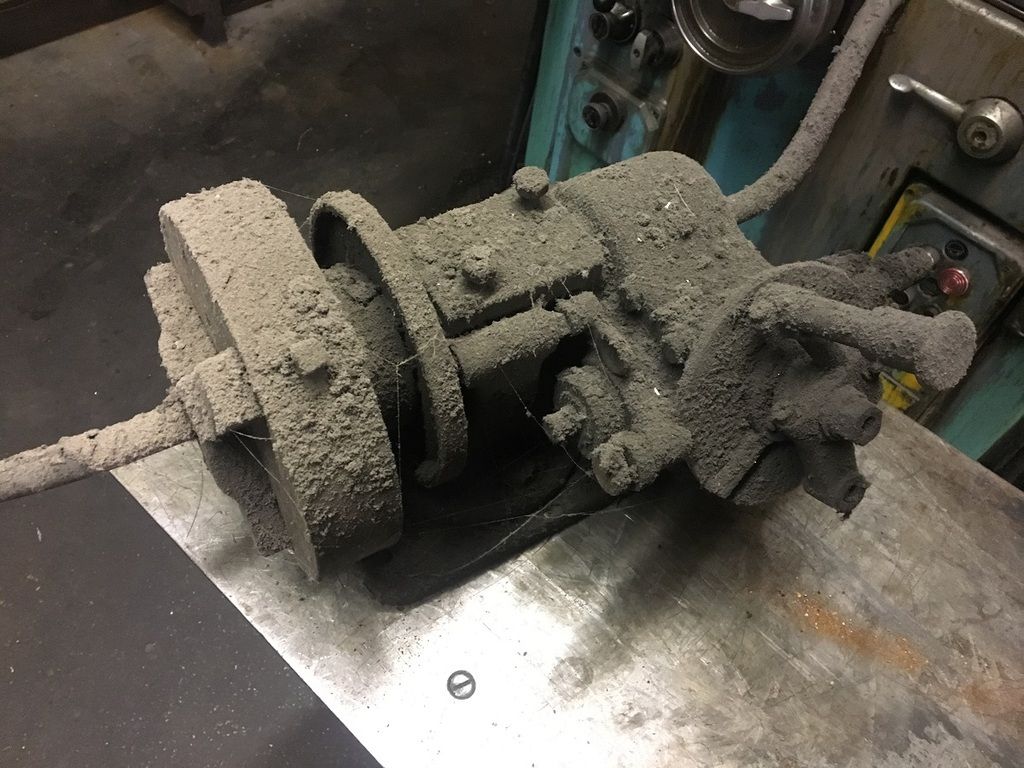
Dirty diff
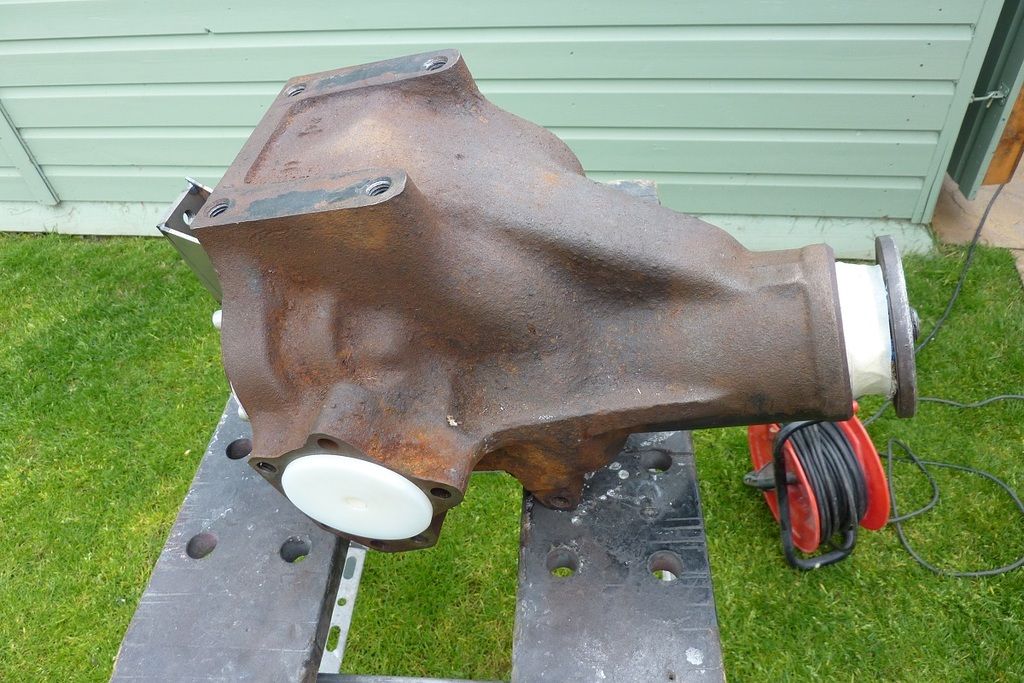
After a silly amount of time with electric drill and wire wheels
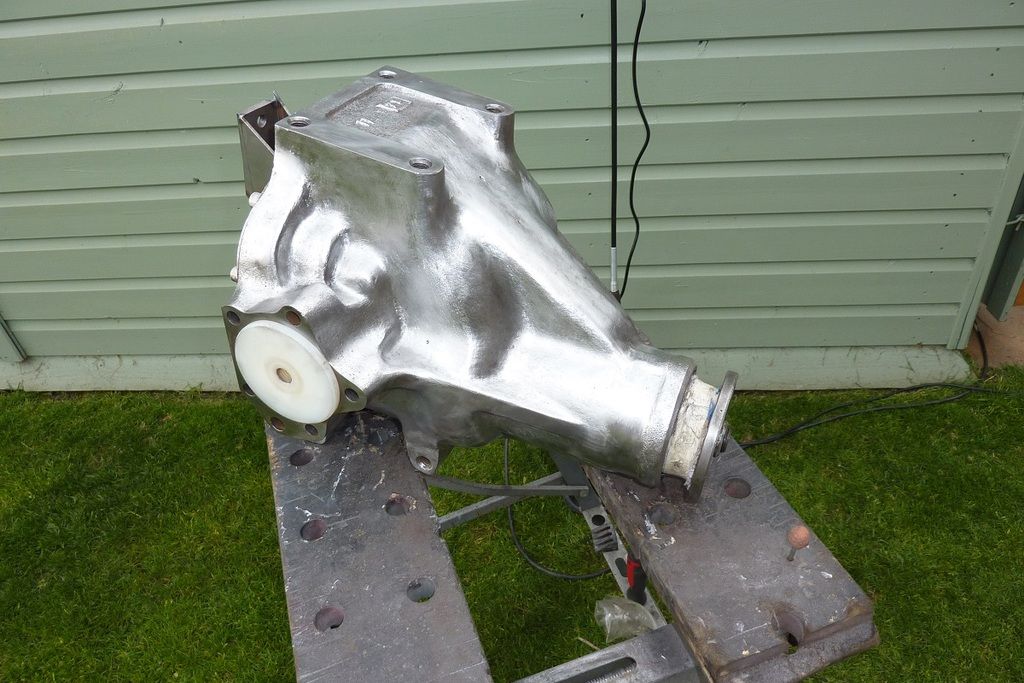
I left it over night and it started to rust from the pores in the steel, so covered it with kurust
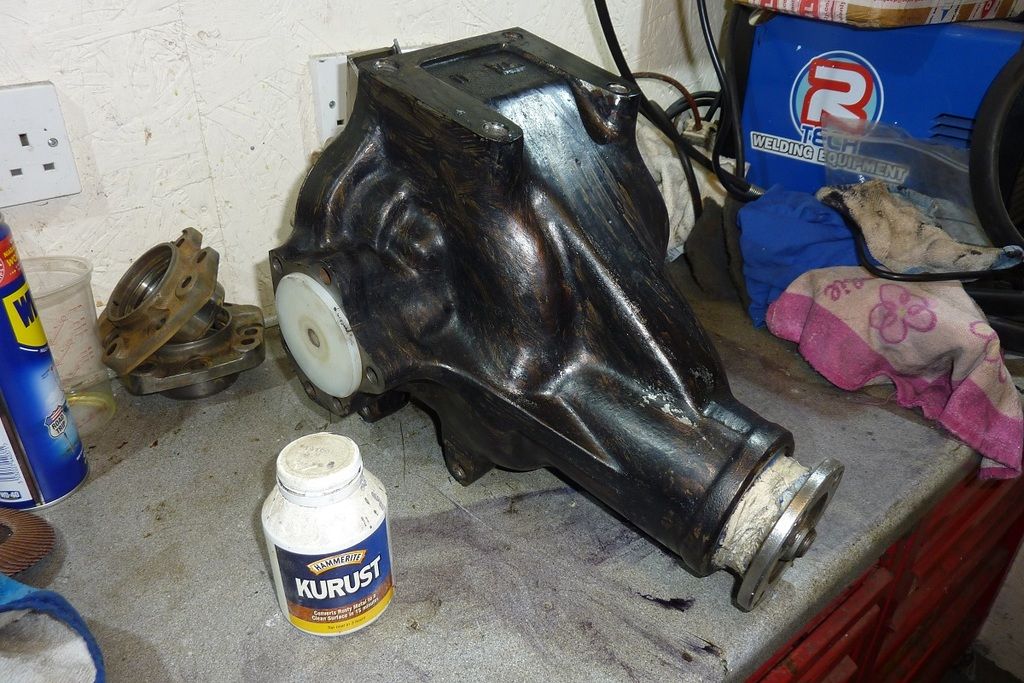
After that was cleaned off some epoxy black
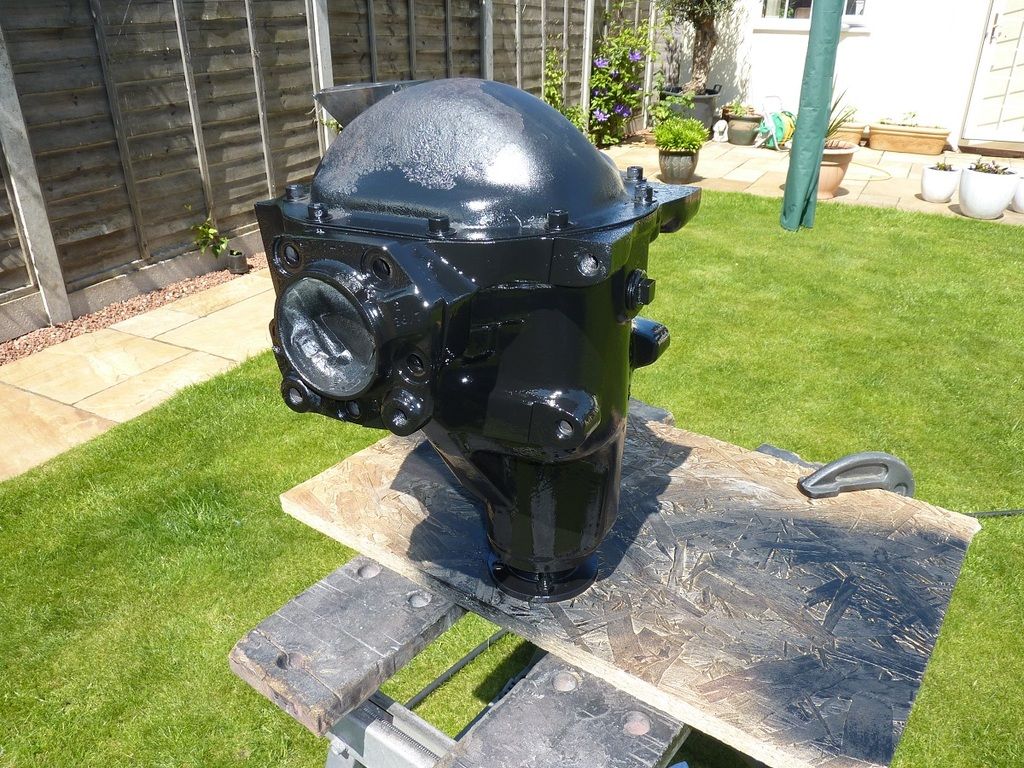
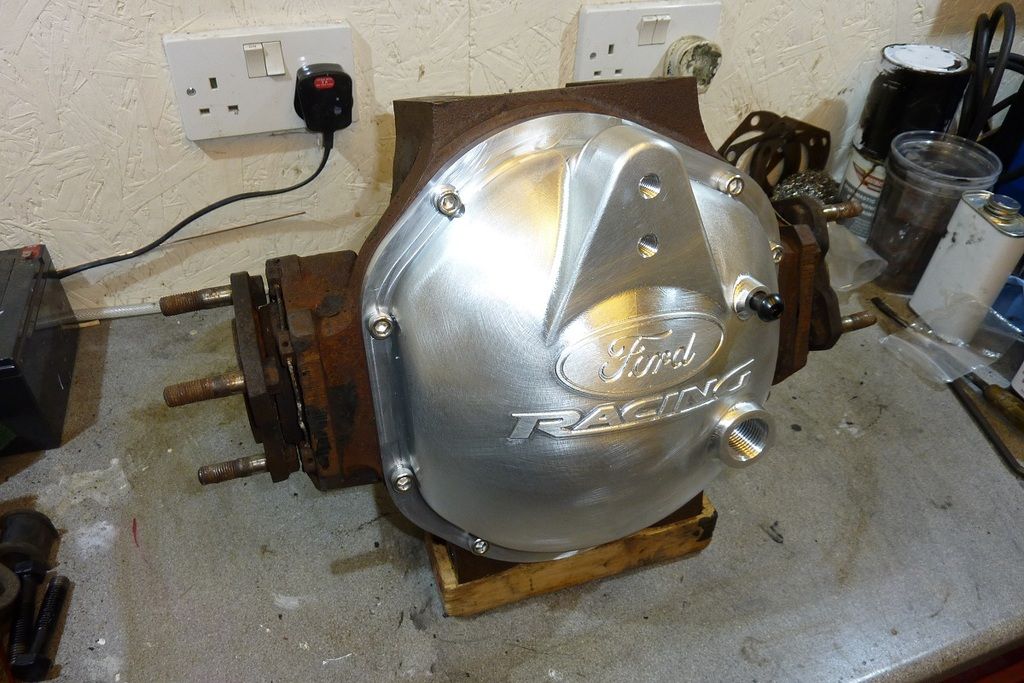
Kind of a back to front post, but I then had the diff re-built and fitted the ali cover.


